
If you love a beautiful platter of rose pink, thinly sliced roast beef, perhaps with a nice au jus sauce and a delicious crust of garlic and black pepper, but wince at the price of prime rib or tenderloin, then eye of round is about to become one of your new favorites for Sunday dinners, special occasions, or for leftovers the next day. I say this because eye of round is one of the most budget-friendly roasts at the butcher counter. Eye of round is a lean piece of meat with a uniform shape, and when cooked correctly, it delivers the kind of tender, deli-style roast beef you might have expected to pay far more for.
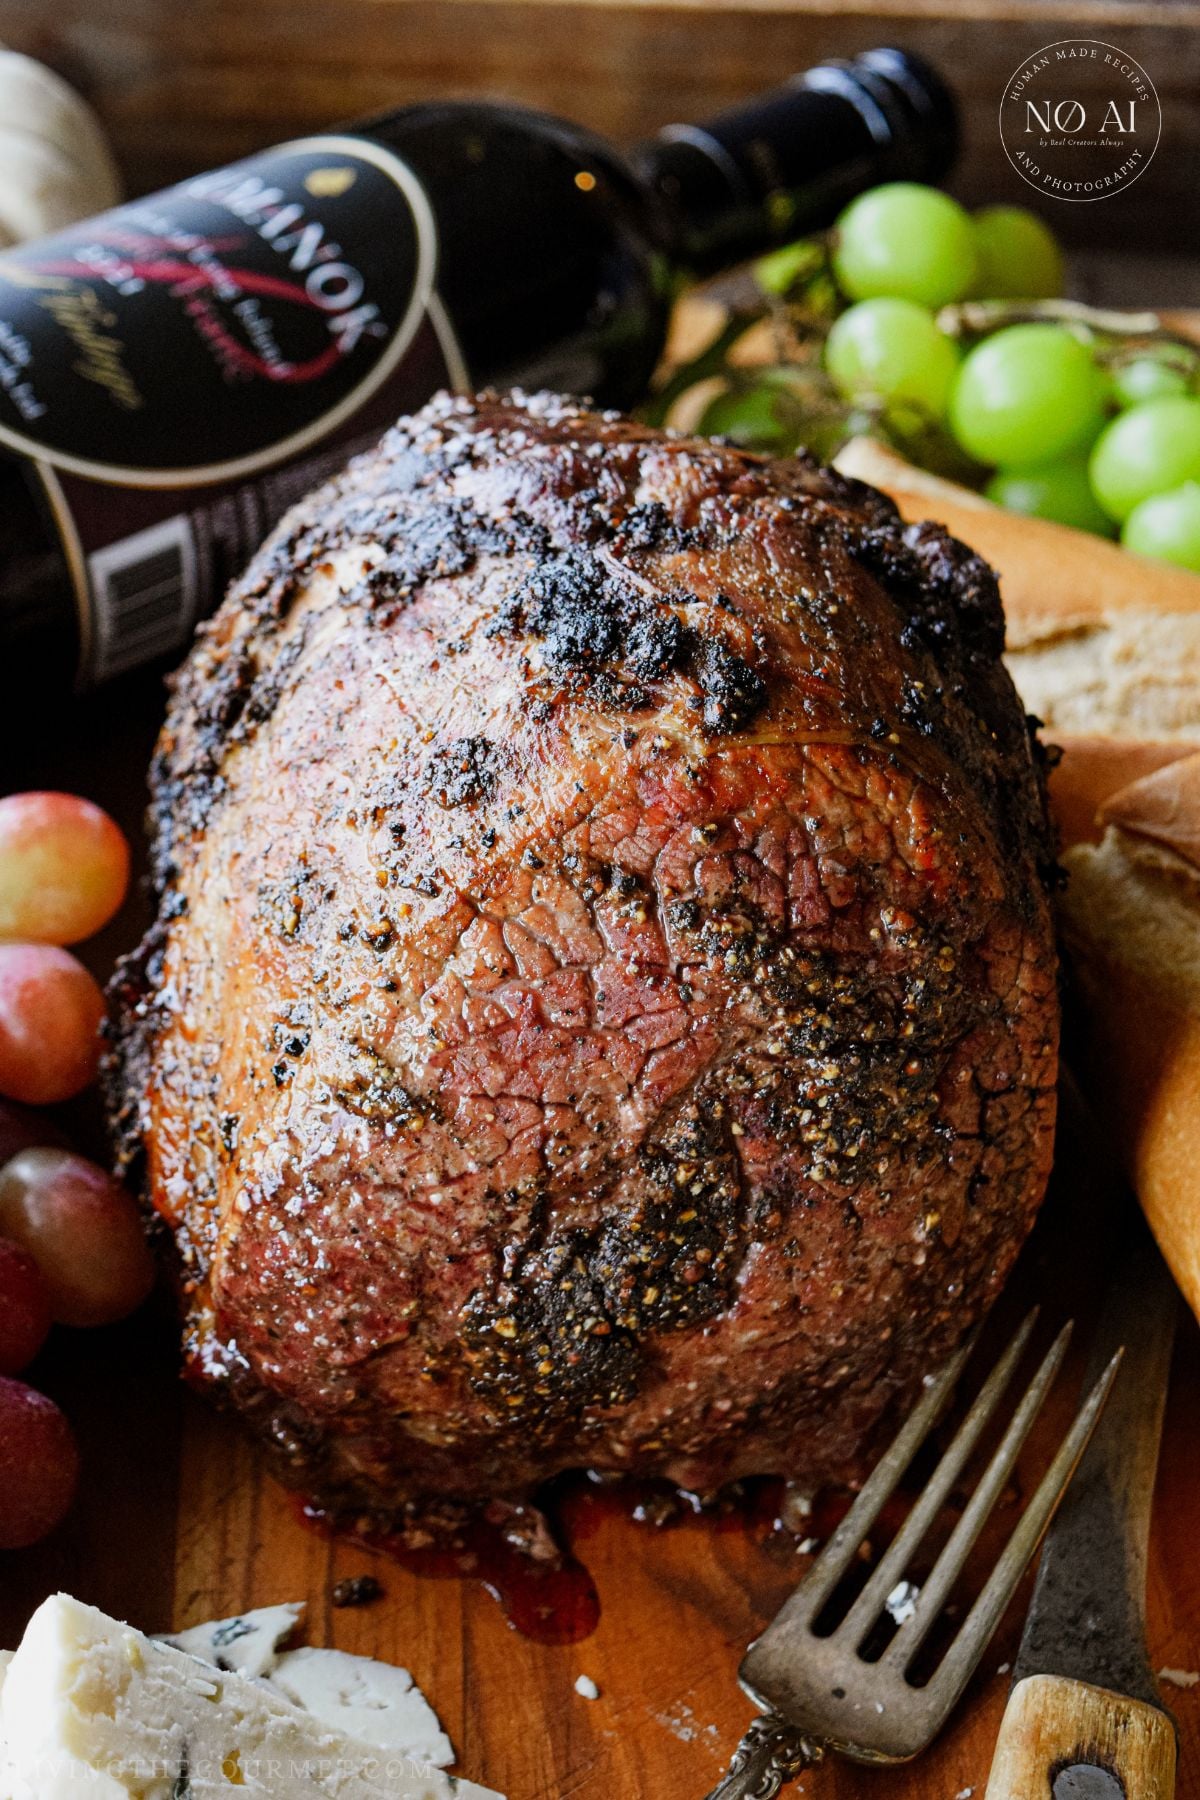
This garlic peppercorn eye round roast gets its big flavor from a rub made of simple ingredients that we've combined in a mortar and pestle. The rub is a super simple combination of whole black peppercorns crushed with roasted garlic cloves that we've charred in their skins, along with kosher salt and olive oil. The end result is a savory paste, rich with roasted garlic flavor that clings to the meat and then roasts into a deeply flavorful garlic peppercorn crust.
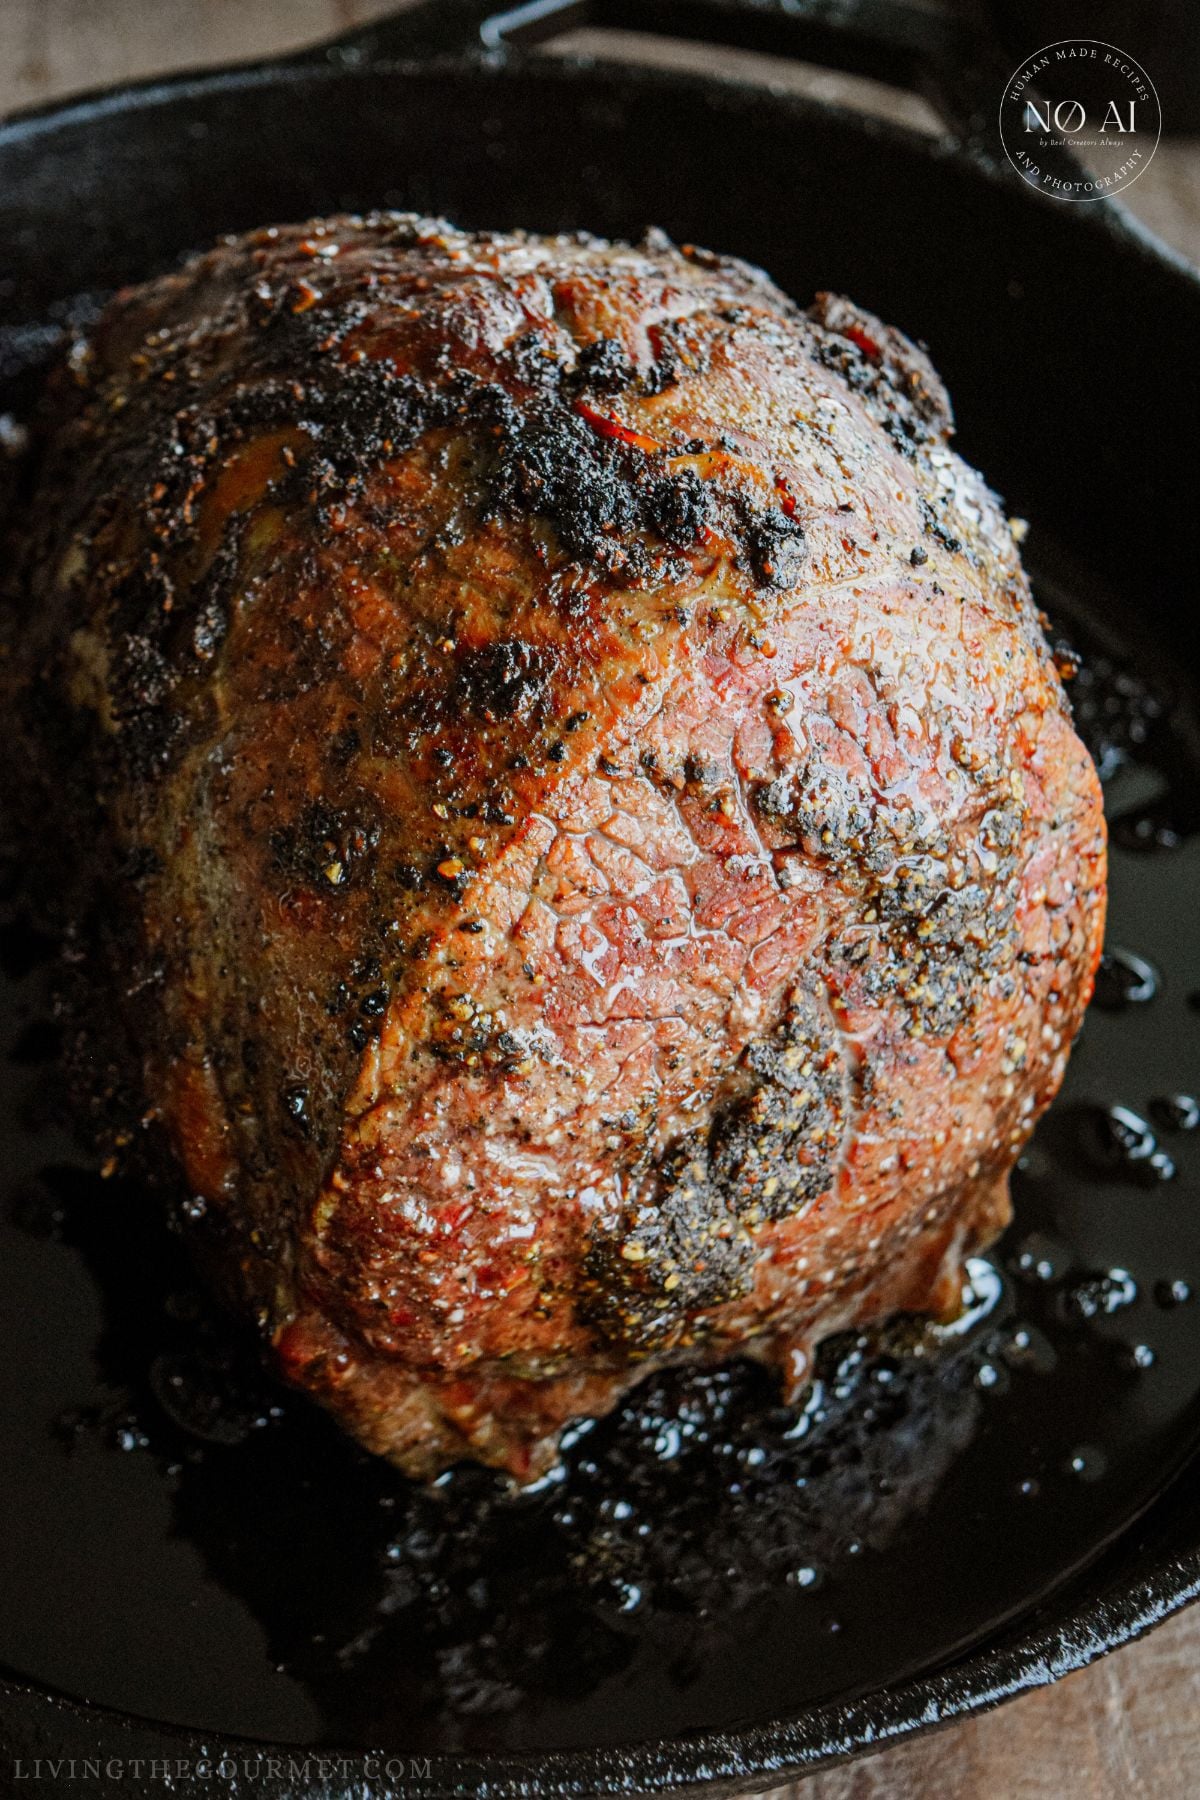
The best part of this recipe, however, is just how straightforward it is to prepare. We start off by searing the roast on the stovetop in a heavy cast iron skillet to create a rich, golden-brown crust, and then we finish the roast in a moderate 350 degrees f oven until it reaches a juicy medium-rare. We then follow that with a 15-minute rest at room temperature, and then slice the roast against the grain, which all combines to create a tender eye of round roast.
Below, I'll be walking you through every step of this recipe, including a time and temperature chart, how to find the grain of the roast, and a recipe for a quick pan sauce to make while the meat rests using the drippings from the roasting pan.
Jump to:
Why this Garlic and Peppercorn Rub Works
Since eye of round roast is so lean, it makes it a tricky cut of beef to prepare, as being so lean means it has a very mild "beef flavor." As such, to prepare a good eye of round roast, you want bold seasoning. Our charred garlic and herb rub achieves precisely that, and with just four ingredients. However, the way eye of round is prepared makes a world of difference and can make or break the flavor of the roast. Here's how:
Charred Garlic Paste vs Raw Garlic
- Pitfalls of Raw Garlic: I generally advise against using raw garlic on the outside of a roast that you plan on searing. Minced raw garlic has a lot of moisture and natural sugars. As such, when minced raw garlic hits a hot pan, it can go from golden to dark brown to bitter in a matter of seconds - due to the scorching of the released juices and sugars. That harsh, acrid flavor then spreads across the whole crust, spoiling the flavor of the roast.
- Why Charred Garlic Works: Charring the garlic solves the problem of the juices and sugars scorching and becoming acrid. When unpeeled and toasted whole in a dry cast iron skillet, the papery skins blacken and protect the garlic inside while it gently softens and steams in its own moisture. The garlic's sharp, pungent bite mellows into something sweet, slightly nutty, and a bit smoky. Once cooled, we peel the cloves and mash them into a paste.
- Better for Searing: Because the garlic is already cooked and mellowed, it holds up better during the sear, browning gently rather than scorching, in part because the dry roasting has already eliminated much of its moisture via steam, and in part because the garlic is more mellow to start. This means that the finished crust tastes deeply savory and garlicky, but without any of the sharp bite or scorched bitterness that raw garlic can bring.
Creating the Perfect Peppercorn Crust
- Maximizing Aroma: I say this every chance I get - freshly ground black pepper has better, richer aromatics. Pre-ground pepper, while fine for heavier, richer recipes or for dusting over eggs or steaks at the table, has lost most of its aroma. By contrast, grinding pepper fresh, or crushing peppercorns in a mortar and pestle, releases their fragrant oils right before cooking. Those oils have largely evaporated or gone stale in pre-ground pepper.
- Why Grind the Peppercorns: While whole peppercorns are great for infusions, pickling, brines, curing, or dry-toasting, this is not a recipe in which we can leave the peppercorns whole. They must be ground or crushed. Coarse peppercorns, on their own, if left unground, will fall off the meat and end up in the bottom of the skillet. This is where the garlic and the olive oil come in. Mashing the crushed pepper together with the garlic, salt, and olive oil creates a thick, cohesive paste that clings to the beef roast through searing.
- Apply the Paste Generously: Every bit of the surface of the roast should be coated in the paste, including both ends, so that every slice has a peppery, garlicky flavor edge.
Master the Cast Iron Sear-to-Oven Method
Why Use Cast Iron?
Because a cast iron eye round roast is the best of both worlds. It provides a deep, flavorful crust from the stovetop and gentle, even cooking in the oven, all in a single pan. Cast iron is ideal for this for a few reasons:
- Cast Iron Holds Heat: A heavy-bottomed cast iron skillet stores a lot of heat and holds onto that heat excellently. This means that the temperature does not plummet when a cold, nearly 5-pound roast goes in for a searing. That steady heat produces an even, deep brown crust instead of a grey, steamed surface.
- Builds Fond: As the roast sears in the cast iron, browned bits of meat and seasoning stick to the bottom of the pan. That flavorful layer, called fond, is the foundation of a quick pan sauce or au jus.
- It goes from stovetop to oven: Cast iron is oven-safe. Thus, the roast can move straight from searing to roasting without changing pans.
A 12-inch skillet gives a large eye of round roast more than enough room to sear on all sides. As such, if your roast is too long to fit flat, you can cut it in half crosswise and sear both pieces. Just note that two smaller pieces will cook a little faster than a single, large roast.
Step-by-Step Stovetop-to-Oven Transition
- Preheat the oven first: Set the oven to 350 degrees F before you begin searing the roast. The oven needs to be ready to receive the roast the instant you are done searing.
- Heat the Skillet: Warm 2 tablespoons of olive oil in a large cast iron skillet over medium heat until the oil begins to shimmer. That is your cue that the oil is ready.
- Sear 2 minutes per side: After rubbing down the roast, place it in the skillet and leave it undisturbed for about 2 minutes, until a golden-brown crust forms and the roast releases easily from the skillet. Turn and repeat on all the sides of the roast, using tongs to hold the roast upright to brown the ends.
- Transfer to the oven: Once the roast is seared, move the skillet directly into the preheated oven to roast the beef.
It is a common belief that searing a piece of meat "locks in" the juices; that is actually a longstanding kitchen myth. What searing really does is build color and an enormous amount of flavor through browning, in addition to forming a textured crust that makes the roast so much more appealing.
Also worth noting - medium heat is intentional. The rub contains garlic, and a moderate sear works to brown the crust quite nicely but without burning the garlic. Finishing the roast in a 350°F oven then cooks the roast gently and evenly, again, without burning the garlic.
Safety Note: Remember that the skillet handle will be extremely hot once it comes out of the oven, and so do remember to grab it with a thick oven mitt. Consider leaving a mitt or towel draped over the handle of the oven door as a reminder.
Eye Round Roast Cooking Time and Temperature Guide
Eye of round has very little fat, which means that the line between tender and tough is often a matter of just a few degrees - which in turn means it is very, very easy to overcook this roast. For best results, I suggest enjoying eye of round rare to medium. An instant-read thermometer or a leave-in digital meat thermometer is the single most important tool for this recipe.
Time vs Internal Temperature Table
Use the following chart as a starting point for cooking at 350°F after searing. As with any time and temperature chart, the times below are approximate, and do vary according to the precise size, starting temperature, and shape of the roast. Begin checking the internal temperature of the roast about 15 minutes before the shortest estimated time, inserting the thermometer into the thickest part of the roast.
| Doneness | Pull from oven at | Final temp after resting | Approx. time per lb at 350°F |
| Rare | 115–120°F | 120–125°F | 10–12 minutes |
| Medium-rare | 120–125°F | 130–135°F | 12–14 minutes |
| Medium | 130–135°F | 140–145°F | 15–17 minutes |
| Roast weight | Rare | Medium-rare | Medium |
| 2 lb | 20–24 min | 24–28 min | 30–34 min |
| 3 lb | 30–36 min | 36–42 min | 45–51 min |
| 4 lb | 40–48 min | 48–56 min | 60–68 min |
| 4.75 lb (this recipe) | 48–57 min | 57–67 min | 71–81 min |
| 5 lb | 50–60 min | 60–70 min | 75–85 min |
Again, and I cannot stress this enough, the shape of the roast matters just as much as its weight, since a long, thin eye of round cooks faster than a short, thick eye of round of the same weight. Furthermore, a roast that goes into the skillet straight from the refrigerator will take a little longer than a roast that went into the skillet at room temperature. That is why the thermometer, not the clock, should always have the final say.
Food Safety Note: The USDA recommends cooking whole cuts of beef to at least 145°F with a 3-minute rest. While many cooks prefer whole roasts cooked to medium-rare, USDA guidance advises against this if serving young children, pregnant guests, or anyone with a weakened immune system.
The Importance of the Rest Period
The rest period is not optional in this recipe. It is, in fact, part of the cooking process, and two important things happen during the 15-minute rest.
- Carryover Cooking Finishes the Roast: A large roast keeps cooking after it leaves the oven. Heat from the hot exterior moves inward toward the center, continuing to cook the roast and raising the internal temperature. The internal temperature typically rises another 5 to 10 degrees. That is why you pull the roast from the oven before it reaches the target temperature. A medium-rare roast pulled at about 120°F to 125°F will continue to cook to a final temperature of 130°F to 135°F or so as it rests.
- The Juices Settle: When the meat comes out of the oven, its juices are concentrated toward the center under pressure from the residual heat. The resting period gives the juices a chance to redistribute and thicken slightly, and this in turn means that they stay in the meat more reliably when you slice into it, instead of releasing onto the cutting board.
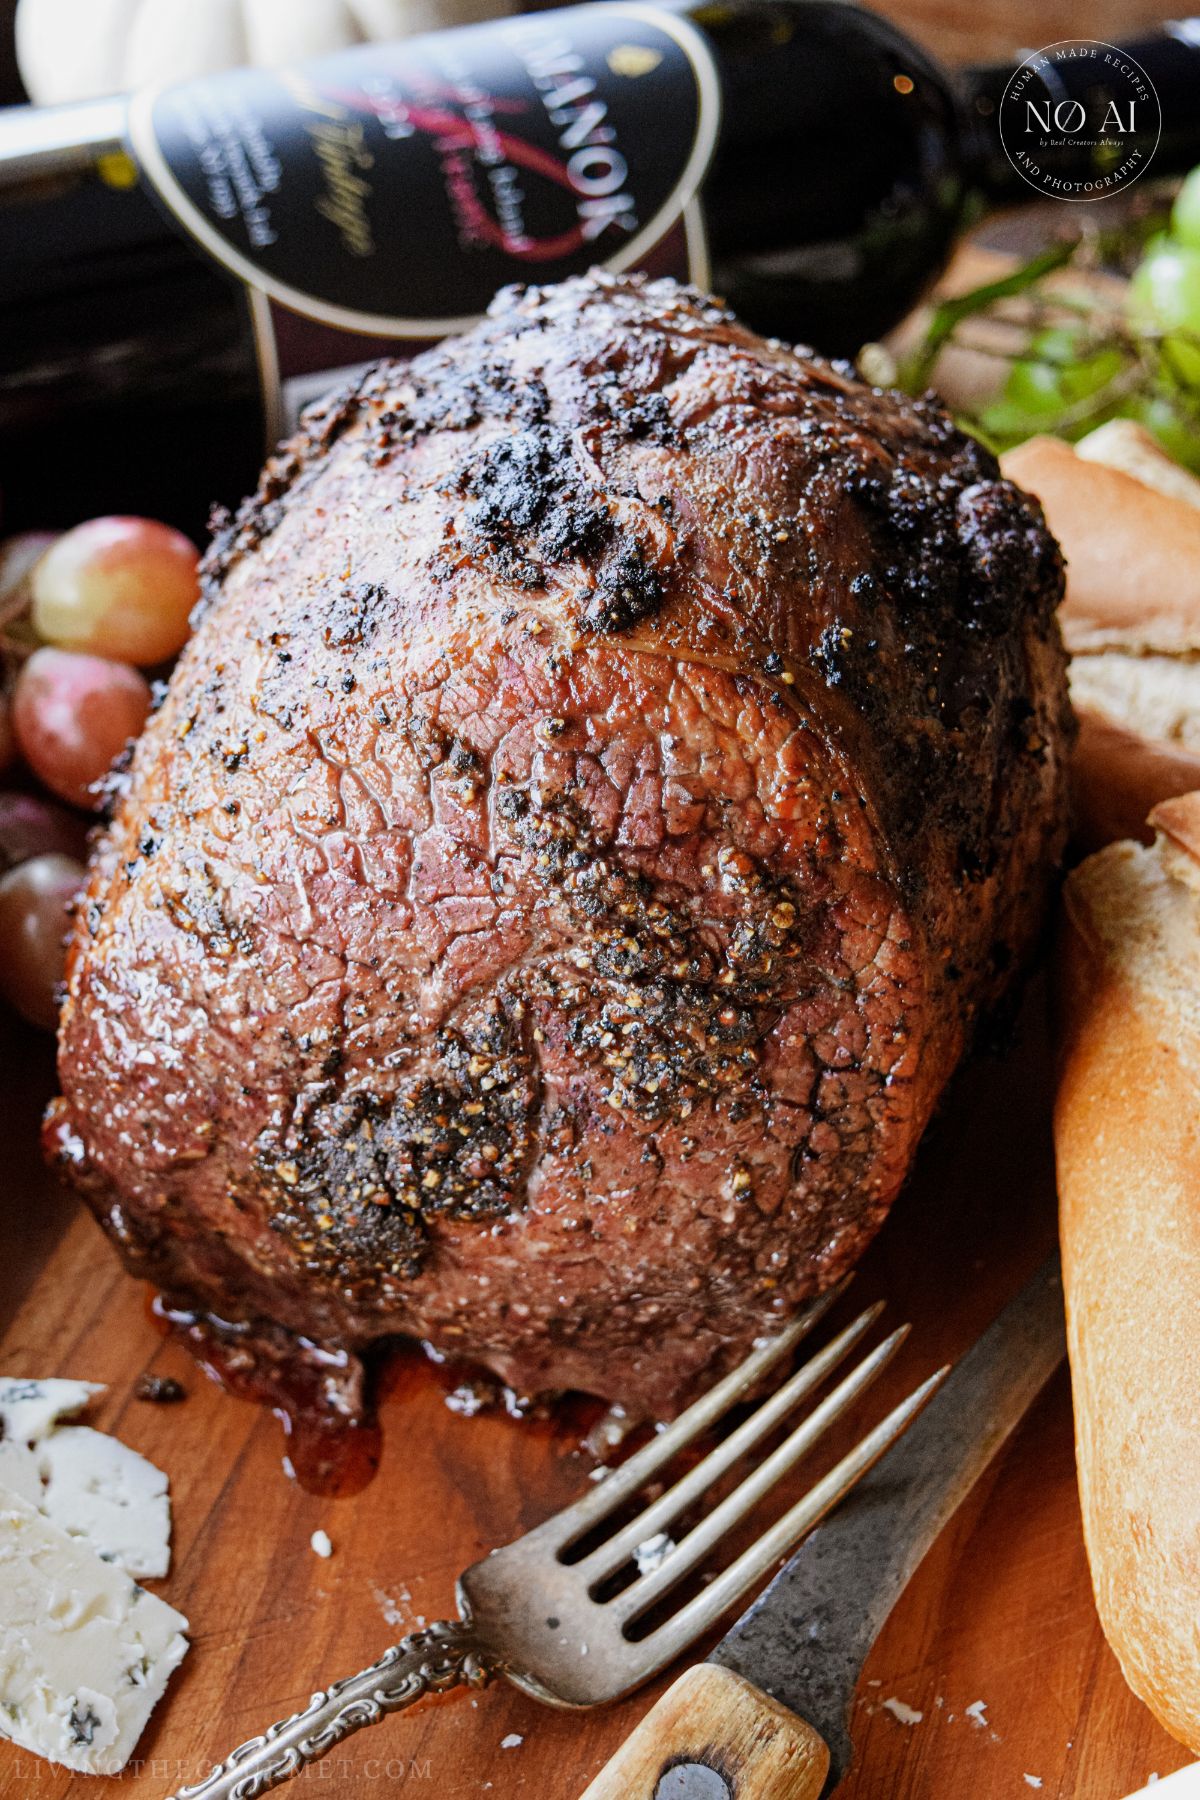
After roasting, transfer the roast to a cutting board and tent it loosely with foil. Do not wrap it tightly, as doing so will trap steam, which in turn will soften the crust you just worked so hard to build. Fifteen minutes is, in my opinion, a perfect amount of resting time for the roast, and also allows you to prepare the pan juices below.
How to Slice Eye Round Roast for Maximum Tenderness
If I had to name a single step that separates a tough eye of round roast from a tender eye of round, it is the slicing. A perfectly cooked and rested eye of round can be ruined by improper slicing. Remember, eye of round is a lean, hard-working muscle and has long, tightly packed fibers. How you cut through those fibers determines how tender each bite will be.
This means you absolutely must cut eye of round against the grain.
Identifying the Grain
The grain is simply the direction in which the muscle fibers run along the meat. On an eye of round, it is very easy to find. The eye of round is a long, cylinder-shaped muscle, and its fibers run along its length, from one end to the other. Look at the surface of the meat closely, and then you will see fine, thin parallel lines running lengthwise down the roast. Those lines are what we call the grain.
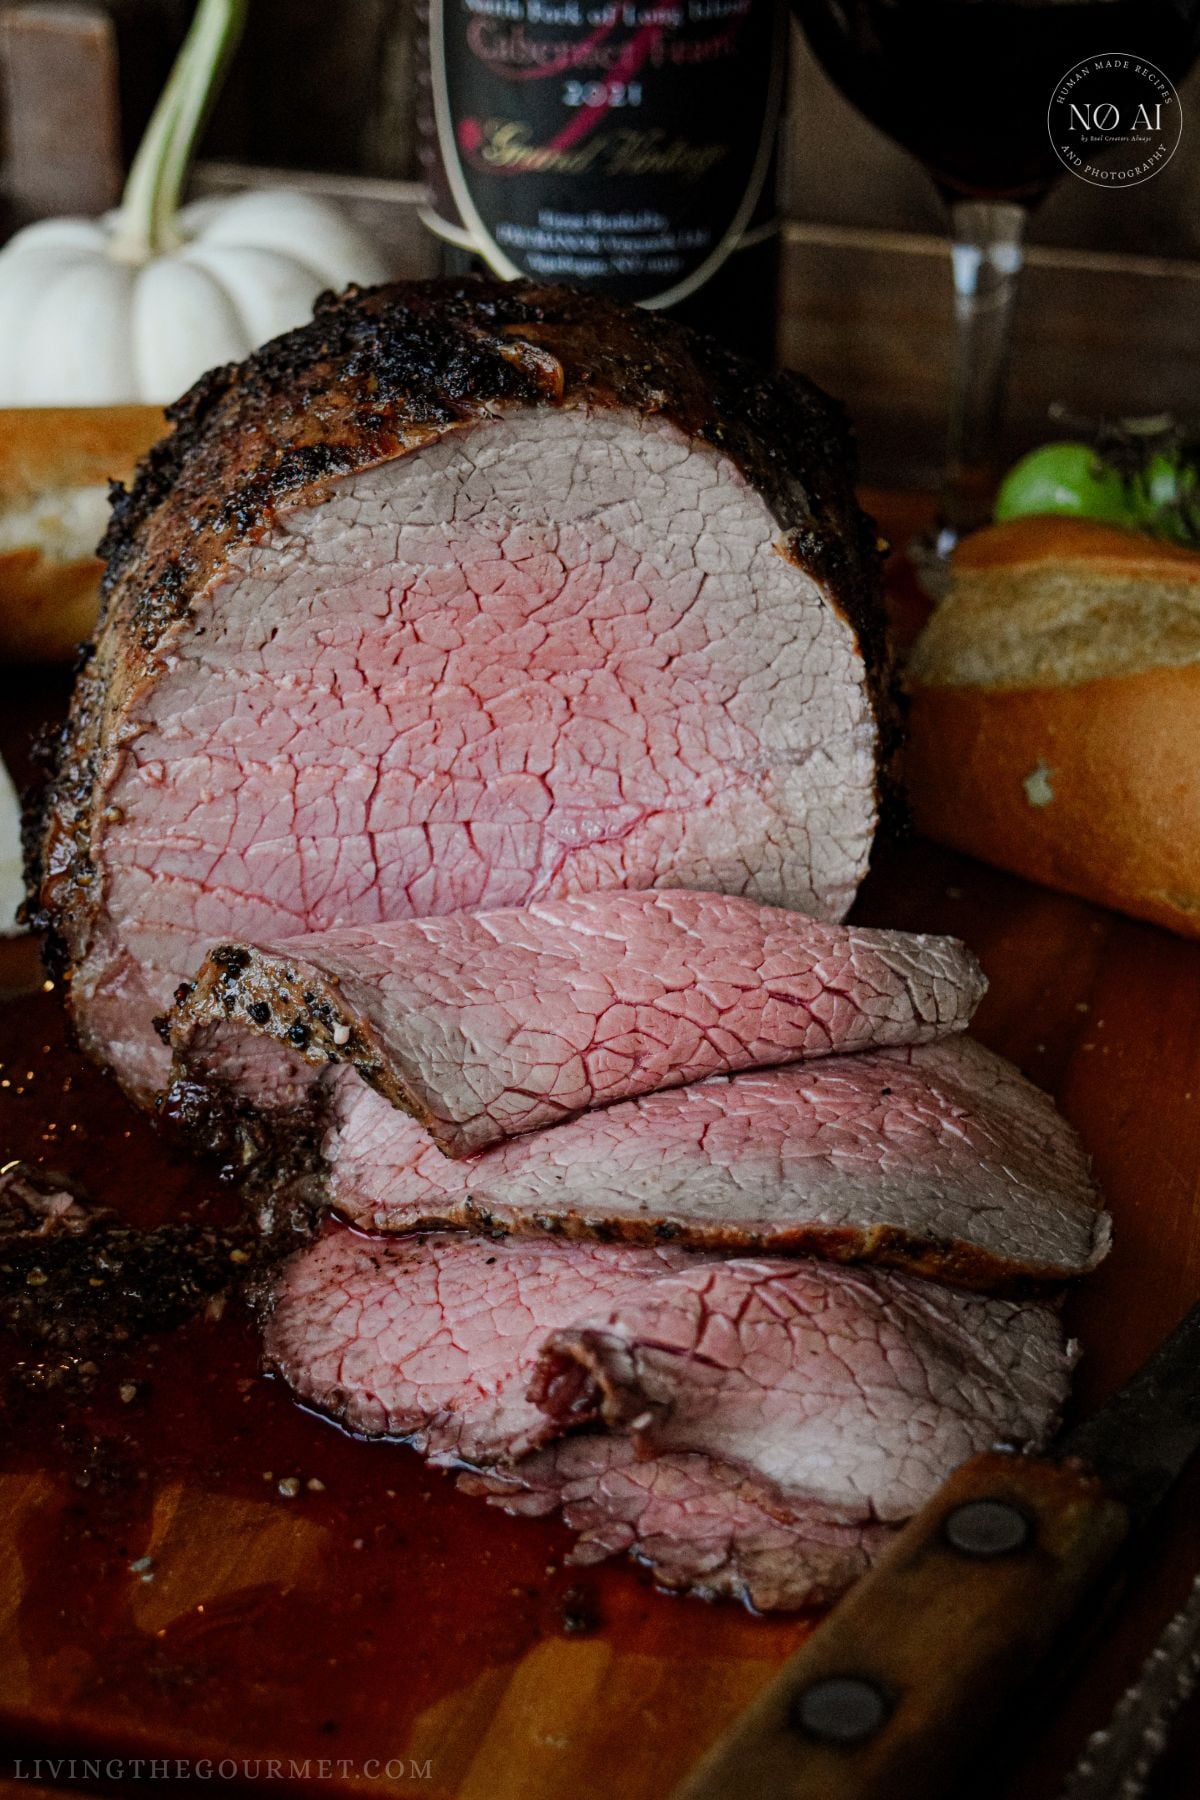
To cut across the grain, you simply slice the roast crosswise into rounds. Think of this almost like slicing a loaf of bread, with your knife perpendicular to those lines of muscle fiber. Each round slice should show the cut ends of the fibers as a fine, dotted pattern.
Slicing Technique
Slicing the meat across the grain cuts those long, tough muscle fibers into shorter strands, so that you do not have to chew through the long, tough muscle fibers. Basically, if you slice with the grain, rather than against the grain, you will find yourself left with long, chewy, stringy fibers that can and will make even a perfectly cooked roast seem chewy.
For an eye of round roast, the thickness of the slices matters just as much as how you sliced it and how well you cooked it. Ideally, you want to be cutting slices at no more than a quarter of an inch; I'm talking paper-thin. This is a lean cut of meat, as I've said a few times now, and we need to do everything we can to maximize tenderness. Thin slices also let the rosy interior and peppery crust shine more than they otherwise would.
Here's how to achieve the best results:
- Use the Right Knife: You want to use a long, very sharp carving knife or slicing knife that allows you to cut each slice in one or two smooth strokes. A dull knife will tear the meat rather than slice.
- Steady the Roast: Hold it in place with a carving fork, and use a cutting board that helps prevent slipping.
- Slice only what you need: Thin slices dry out quickly, so slice just before serving and keep the rest of the roast unsliced until you are ready for more.
- If Slicing for Cold Cuts or Sandwiches: If you are using the roast for cold cuts or sandwiches, chill the roast completely before slicing.
Bonus Tip: Fast Cast Iron Pan Gravy (Au Jus Sauce)
Don't rinse out that cast iron pan just yet, since those brown bits and juices coating the bottom are the secret ingredient for a quick au jus sauce (or pan gravy). To make a quick au jus. Then pour about a half cup of beef broth into the pan along with salt and pepper, a tablespoon of butter, and a dash of Worcestershire sauce. Let that simmer over low heat, stirring constantly. Do not let the sauce come to a boil. You merely want it to simmer.
Let it simmer for about 2 minutes, until it has reduced somewhat. Then taste, and adjust the seasoning to your preference. Remove from the heat, and spoon it over the sliced roast, or serve it on the side for dipping.
Frequently Asked Questions
Absolutely, and that is probably one of my favorite uses for this recipe. The key here is to let the roast cool after resting. After that, wrap it tightly and refrigerate it whole for several hours or overnight. A thoroughly chilled roast is firm, and this allows for easier cutting into paper-thin, cold-cut slices or deli-style slices. Of course, to slice this thinly, I do recommend a good-quality sharp knife or even a meat slicer. Regardless, these slices are great for roast beef sandwiches, wraps, or a cold platter with horseradish sauce. Store the cooked roast in an airtight container in the refrigerator and enjoy it within 3-4 days.
Absolutely no problem at all. For the peppercorns, place them in a zip-top bag, and crush them with a rolling pin, or hammer them with a meat mallet. You can even use the bottom of a heavy skillet. Naturally, and less dramatically, you can always use a simple pepper grinder on its coarsest setting, or pulse the peppercorns briefly in a spice grinder. Regardless of how you crush the peppercorns, what you do not want is for the pepper to become a fine powder. You want coarsely ground pepper.
For the garlic, place the peeled, charred cloves on a cutting board, sprinkle them with salt, and mash them into a paste with the flat side of a chef's knife, then create a garlic paste by stirring the garlic together with the crushed pepper and olive oil in a small bowl.
Mashed potatoes or roasted potatoes are both great options, as is Yorkshire pudding, roasted carrots, or green beans with garlic. Sautéed mushrooms are also a natural fit. As always, a crisp green salad is also a reliable choice.
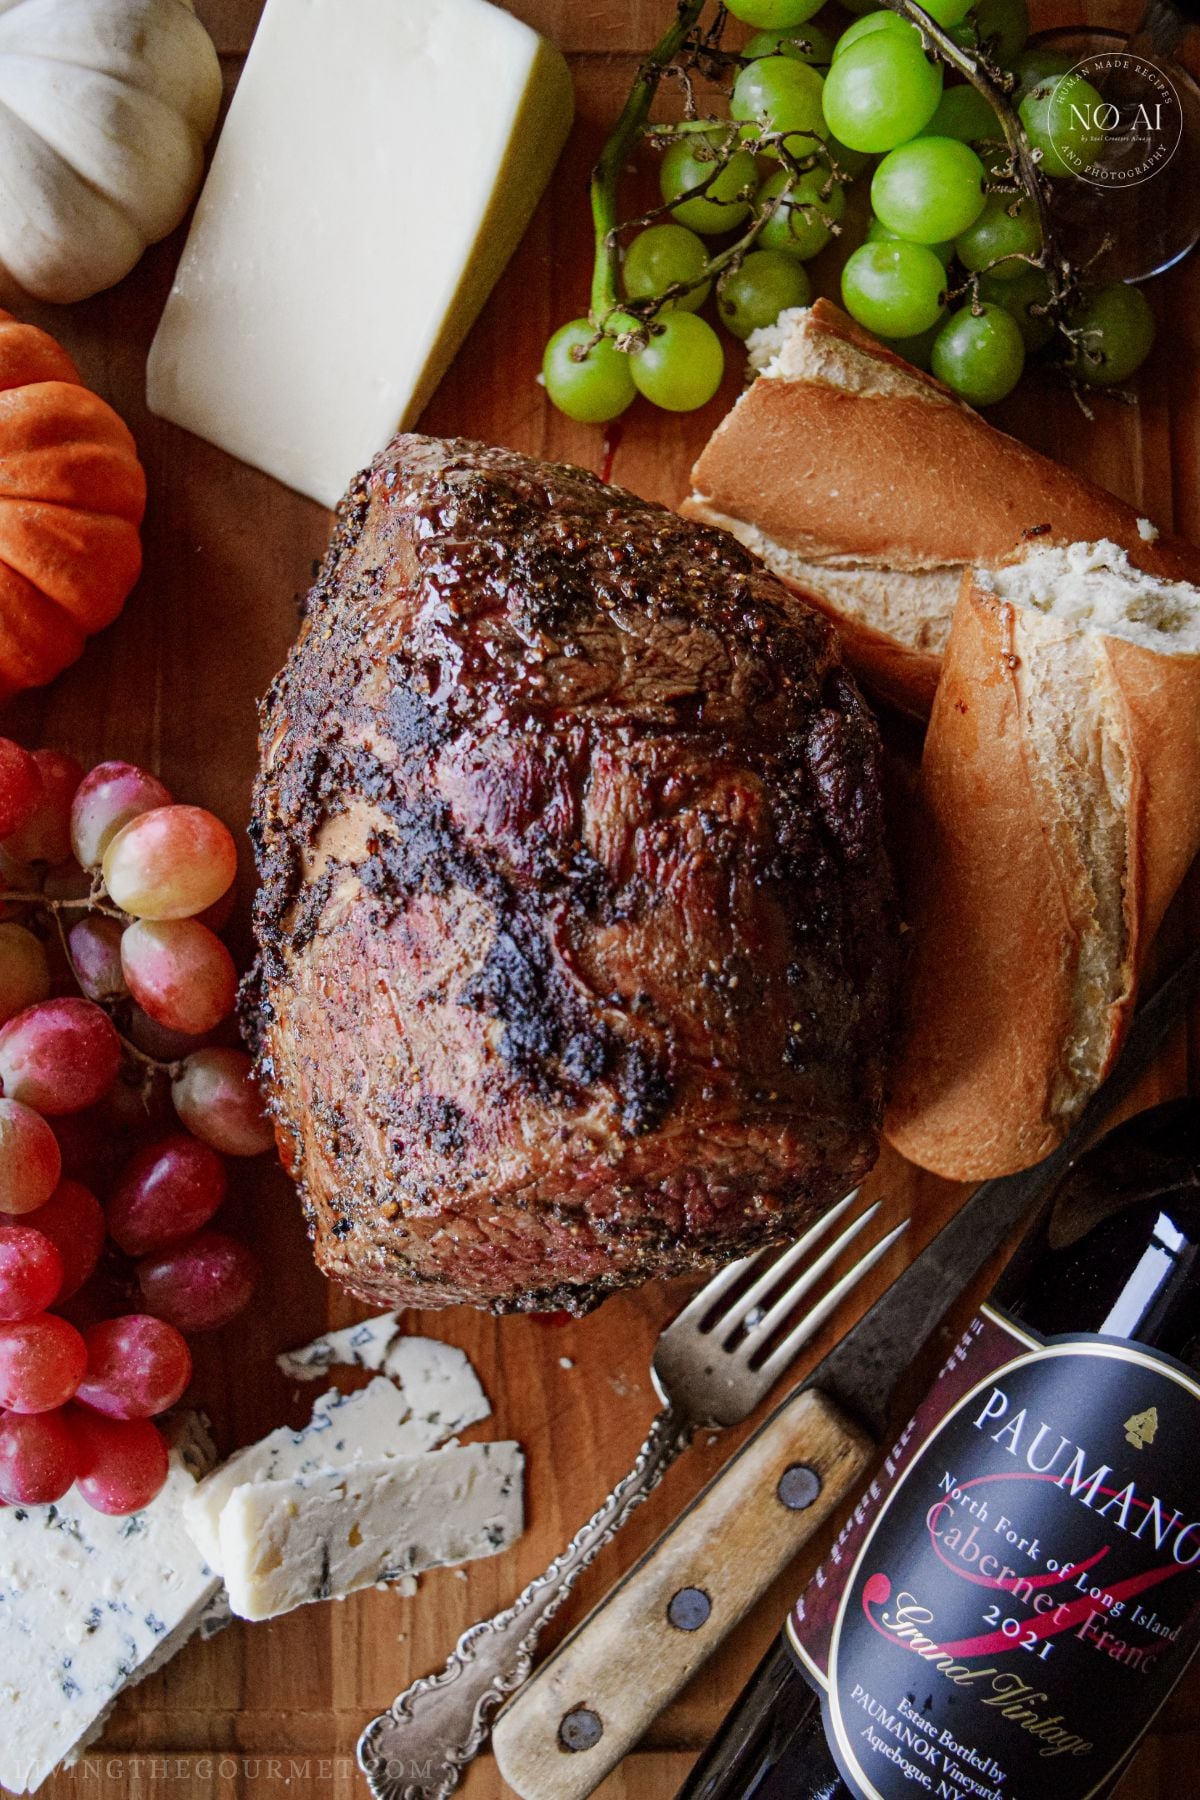
Eye of round is lean, and so the best wine pairings are, in my opinion, medium-bodied reds that feature a lively, bright acidity and moderate tannins. I would stay away from big, heavily oaked bottles, whose firm tannins would make the beef taste dry due to its leanness. Cabernet Franc is an especially good match. Cabernet Franc's characteristic red fruit notes, dried herbs, and subtle black pepper would deliciously echo the cracked peppercorn crust, while its bright acidity, meanwhile, would keep the bite of roast tasting fresh.
The most common causes of a tough eye of round are overcooking and slicing incorrectly. This cut is so lean that it becomes dry and tough when cooked past medium, so I strongly recommend using a meat thermometer. Also, slicing is just as important. An eye of round roast must be sliced thin against the grain, since even a perfectly cooked eye of round can be made tough by improper slicing. For a complete guide on how to prepare a tender eye of round roast, see my complete guide here.
Tender Garlic and Peppercorn Eye of Round Roast
- Total Time: 1 hour 10 minutes
- Yield: 4-6 1x
Ingredients
- 4.75 lb. Eye Round Roast
- 2 tbsp. olive oil
- Large cast iron frying pan
For the Rub:
- 2 tbsp. Whole peppercorns, crushed in a mortar and pestle
- 5-7 large garlic cloves, grilled in their skins
- 1 tsp. salt
- 2 tbsp. olive oil
Instructions
- Place the garlic bulb in a small, dry cast-iron frying pan.
- Let the skin of the garlic turn charred. Let the garlic cool and then remove it from its skin.
- Place the peppercorns in the mortar and pestle and crush them.
- Add the garlic, salt, and olive oil to the pestle, and mash.
- Rub this mixture all over the roast.
- Heat a large cast iron frying pan with 2 tbs. of olive oil over medium heat, then sear the roast on all sides for about 2 minutes per side to develop a nice sear.
- Preheat the oven to 350°F.
- For a medium-rare roast, cook the roast for 12 - 14 minutes per pound.
- Let the roast rest for about 15 minutes before carving, and carve it thinly across the grain to ensure it is as tender as possible, since it is an eye of round roast.
- Prep Time: 10 minutes
- Cook Time: 1 hour
- Category: Dinner
- Method: Roasting
- Cuisine: American
And that's our Tender Garlic and Peppercorn Eye of Round Roast recipe. If you have any questions or suggestions, be sure to let us know in the comments below; we always love hearing from you!
Happy cooking!


Leave a Comment