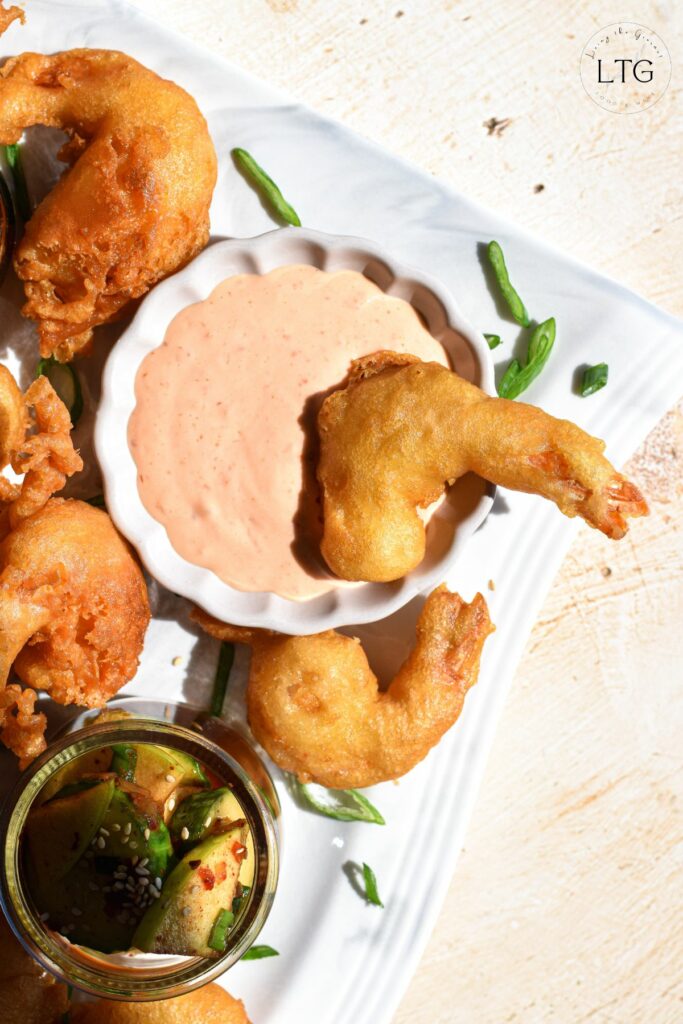
If you want to know how to cook tempura shrimp that's light, golden, and perfectly crispy, you've come to the right place.
Today, I want to teach you how to make restaurant-worthy tempura at home and to show you just how easy it can be. Best of all, I promise it will be just as delicious - or better! - than what you can find in any of your favorite Japanese restaurants. And the best thing about this shrimp tempura recipe is that it's super simple. Yes, you heard that right. This recipe uses only simple ingredients and requires only a few key steps to achieve a crispy batter that is as delicious as the shrimp it's coating.
Using only simple ingredients and requiring just a few easy steps, if you can fry up some jumbo shrimp, I promise you can make this popular Japanese dish. And it's popular for a reason. While our shrimp tempura is hearty enough to serve as a main course on its own, maybe alongside white rice or a seaweed salad, it's also light enough to serve in bento boxes or as a side to heavier dishes, making this tempura shrimp recipe incredibly versatile.
All right, now that we have the introduction out of the way, let's cook some crispy shrimp tempura!
What Makes Tempura Different?
So what 'makes' tempura? How is it different from other fried food recipes? It all comes down to the light batter and delicate texture, taking powerful cues from traditional roots in Japanese cuisine. Most Western-style fried shrimp (or other Western fried foods in general, like calamari or onion rings) rely on some combination of thick coatings, breadcrumbs, and heavy seasoning. By contrast, ebi tempura (shrimp tempura) is all about achieving a clean and subtle flavor combined with an ultra-crispy coating.
Key Differences:
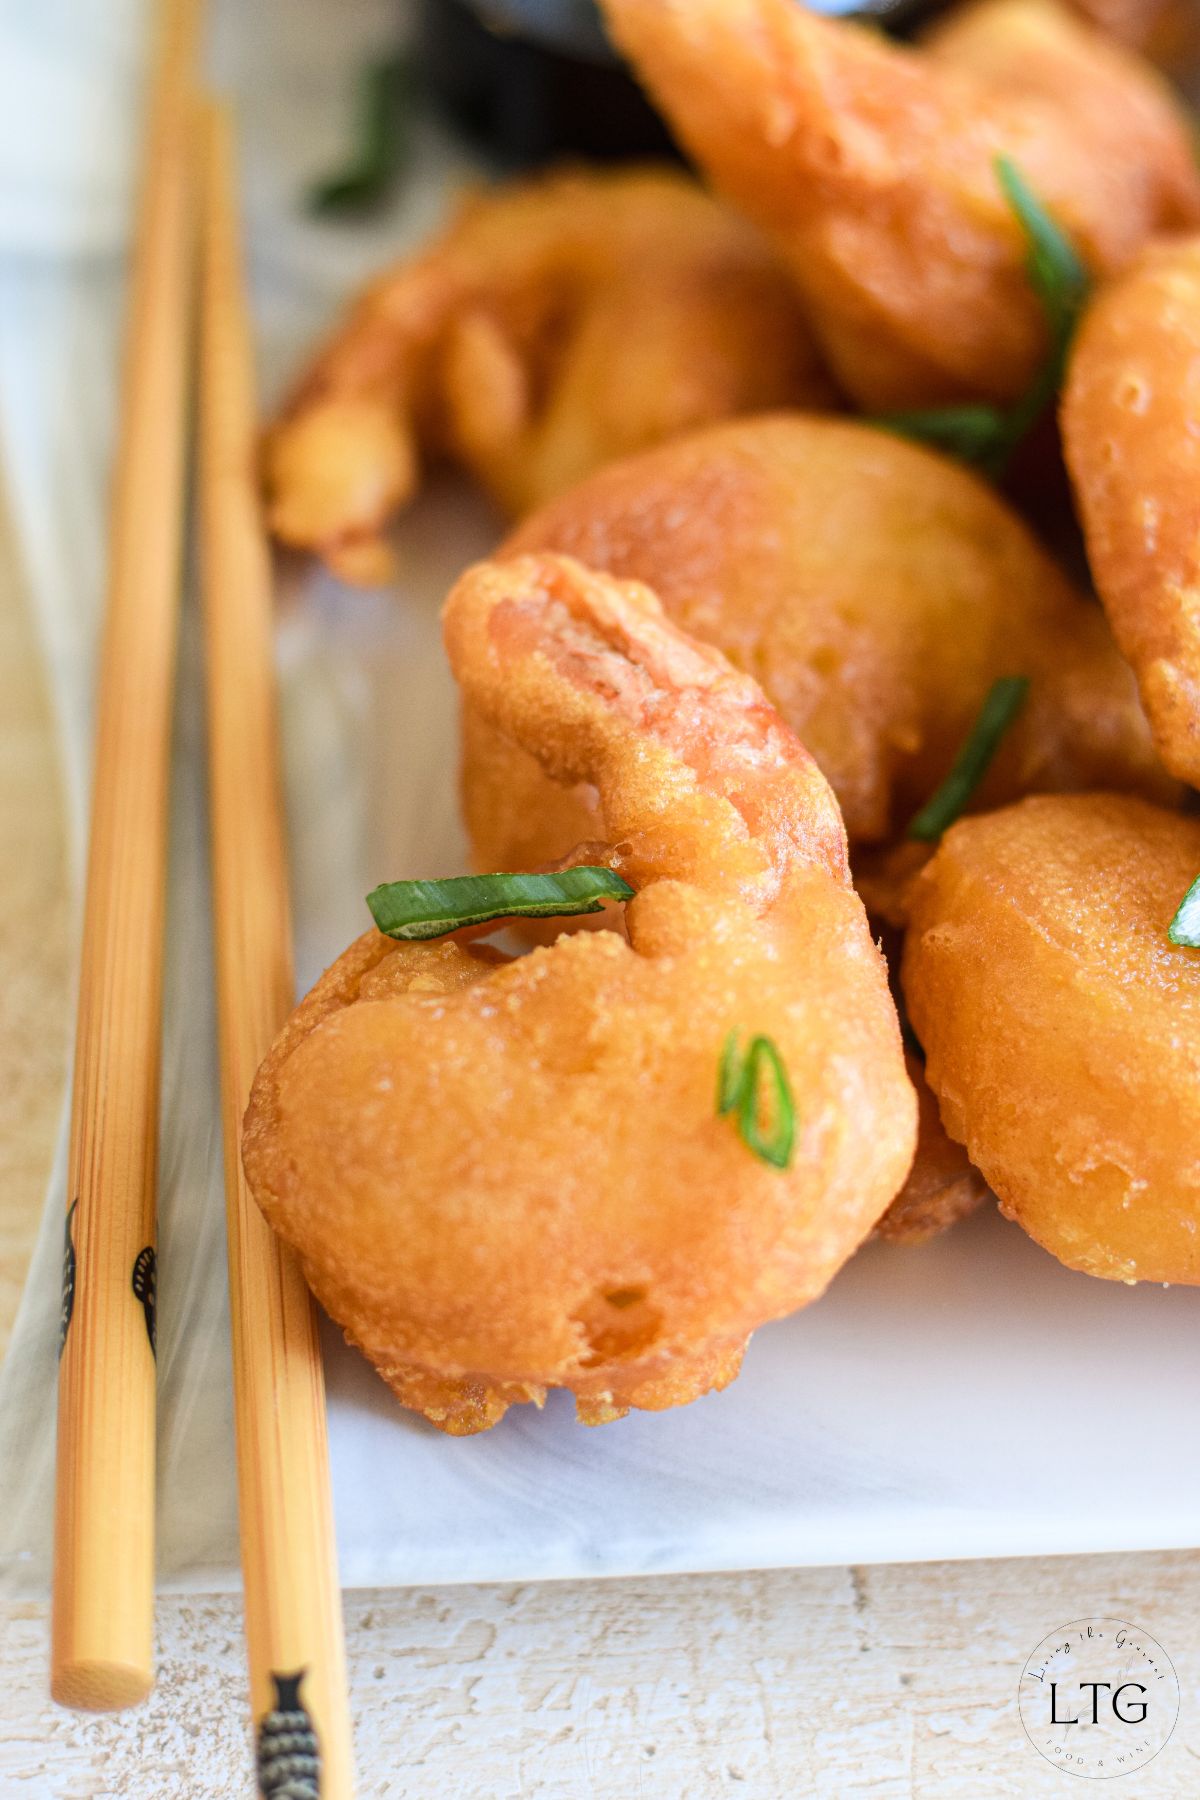
- Light Batter, No Breadcrumbs: The defining characteristic is the batter. Full stop. Unlike other deep fried shrimp recipes that use panko or standard flour dredging, followed by an egg wash and breadcrumbs combo, tempura uses a simple batter made from rice flour or all-purpose flour, cornstarch, cold water (or carbonated water), and sometimes an egg (for fat to help crisp through frying and as leavening). This creates a much lighter batter, a batter that crisps up into a crunchy, golden brown shell that adheres rigidly to the food.
- Cold Batter: Tempura starts with an ice-cold batter, and that's probably the biggest difference. While I can't pretend to understand the science behind gluten formation and how that relates to the difference in temperature, basically, by dropping cold batter into hot oil, we shock the oil, leveraging the temperature differential to help achieve tempura's signature texture while minimizing oil absorption, which helps create a crunchy batter.
- Minimal Seasoning: When cooking shrimp tempura, subtlety is key, and that means you don't want to weigh down your tempura with lots of seasoning. Instead, you want the batter - and what it's coating - to do the talking. Instead, keep the batter itself minimally seasoned. You want to highlight, rather than overpower or mask, the shrimp's natural flavor. By contrast, many standard fried shrimp recipes rely heavily on spices and seasoned coatings - but not tempura.
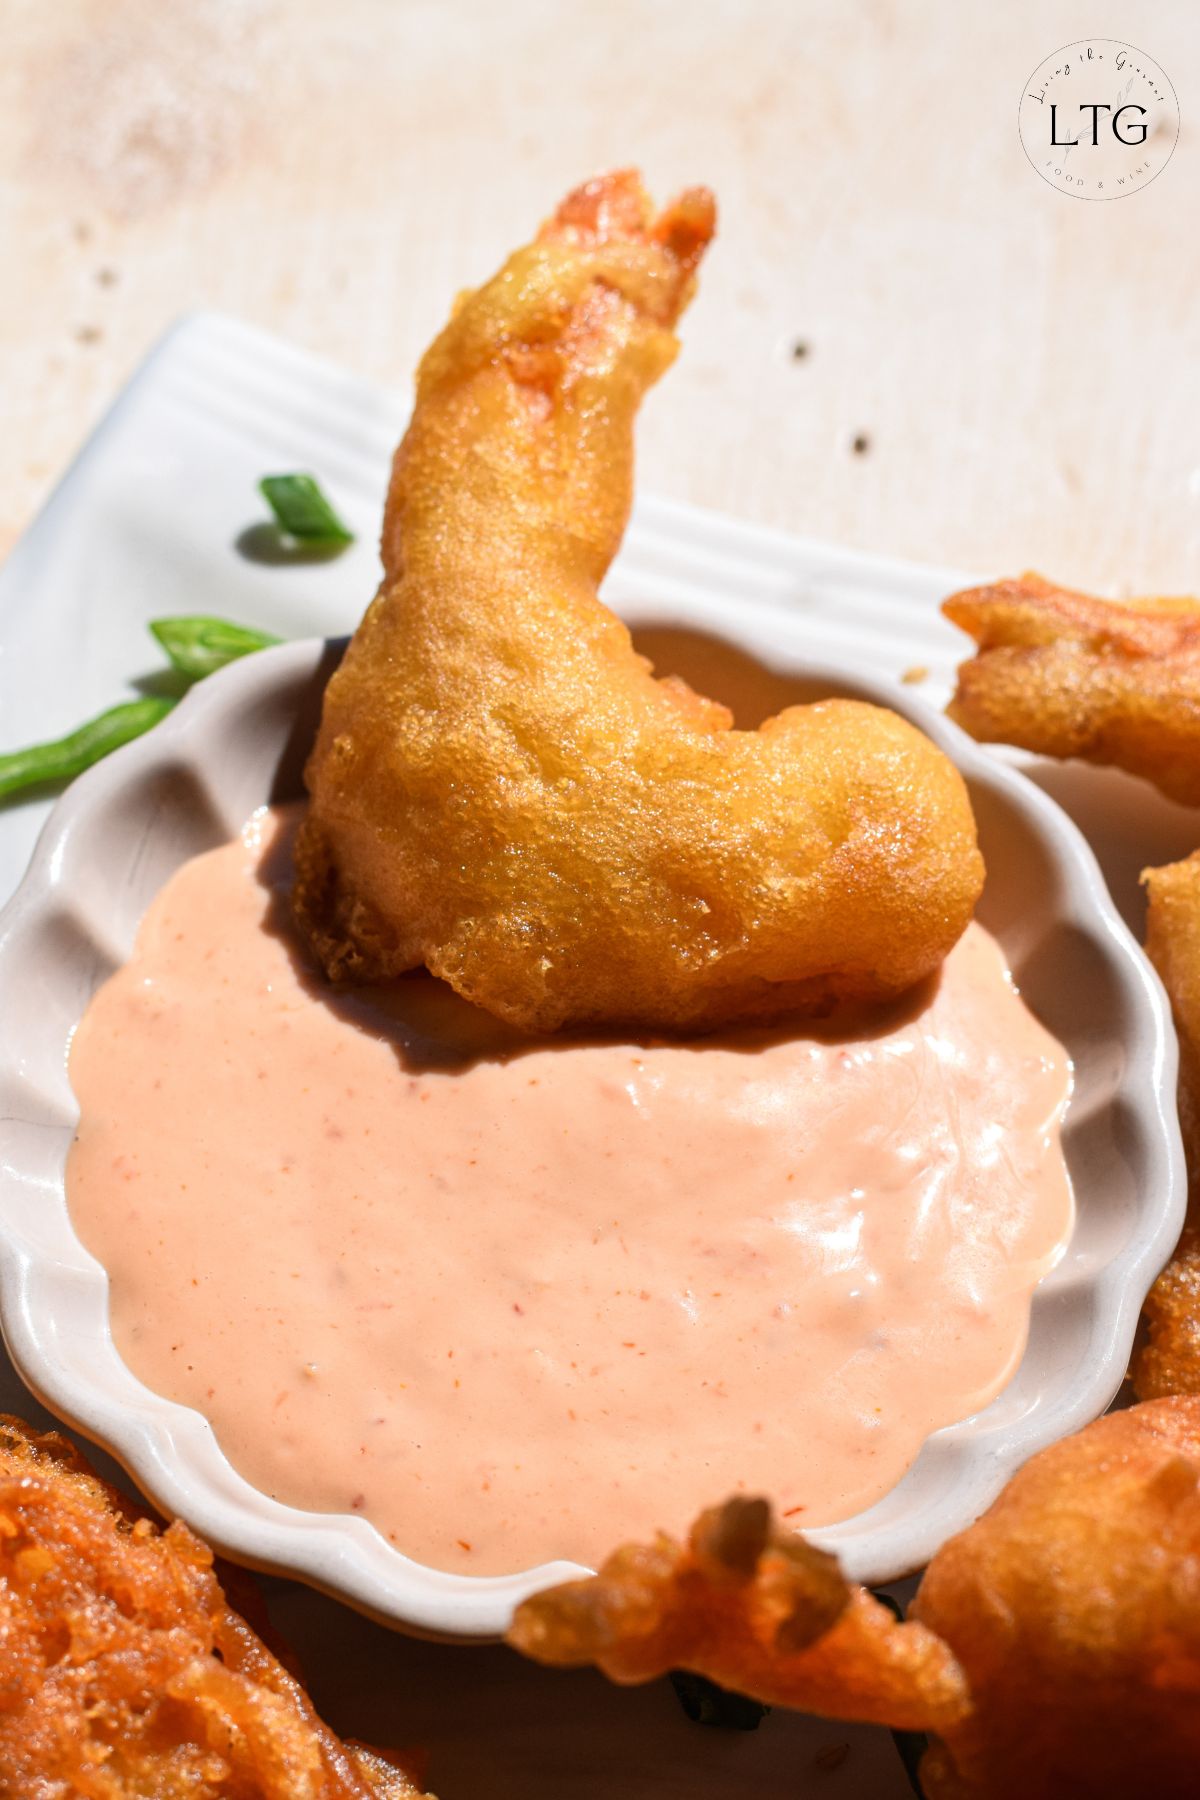
- Golden Brown Perfection: Tempura should be fried just until it turns golden brown. The crust should feature a lacy interior, crisp exterior, and a tender bite.
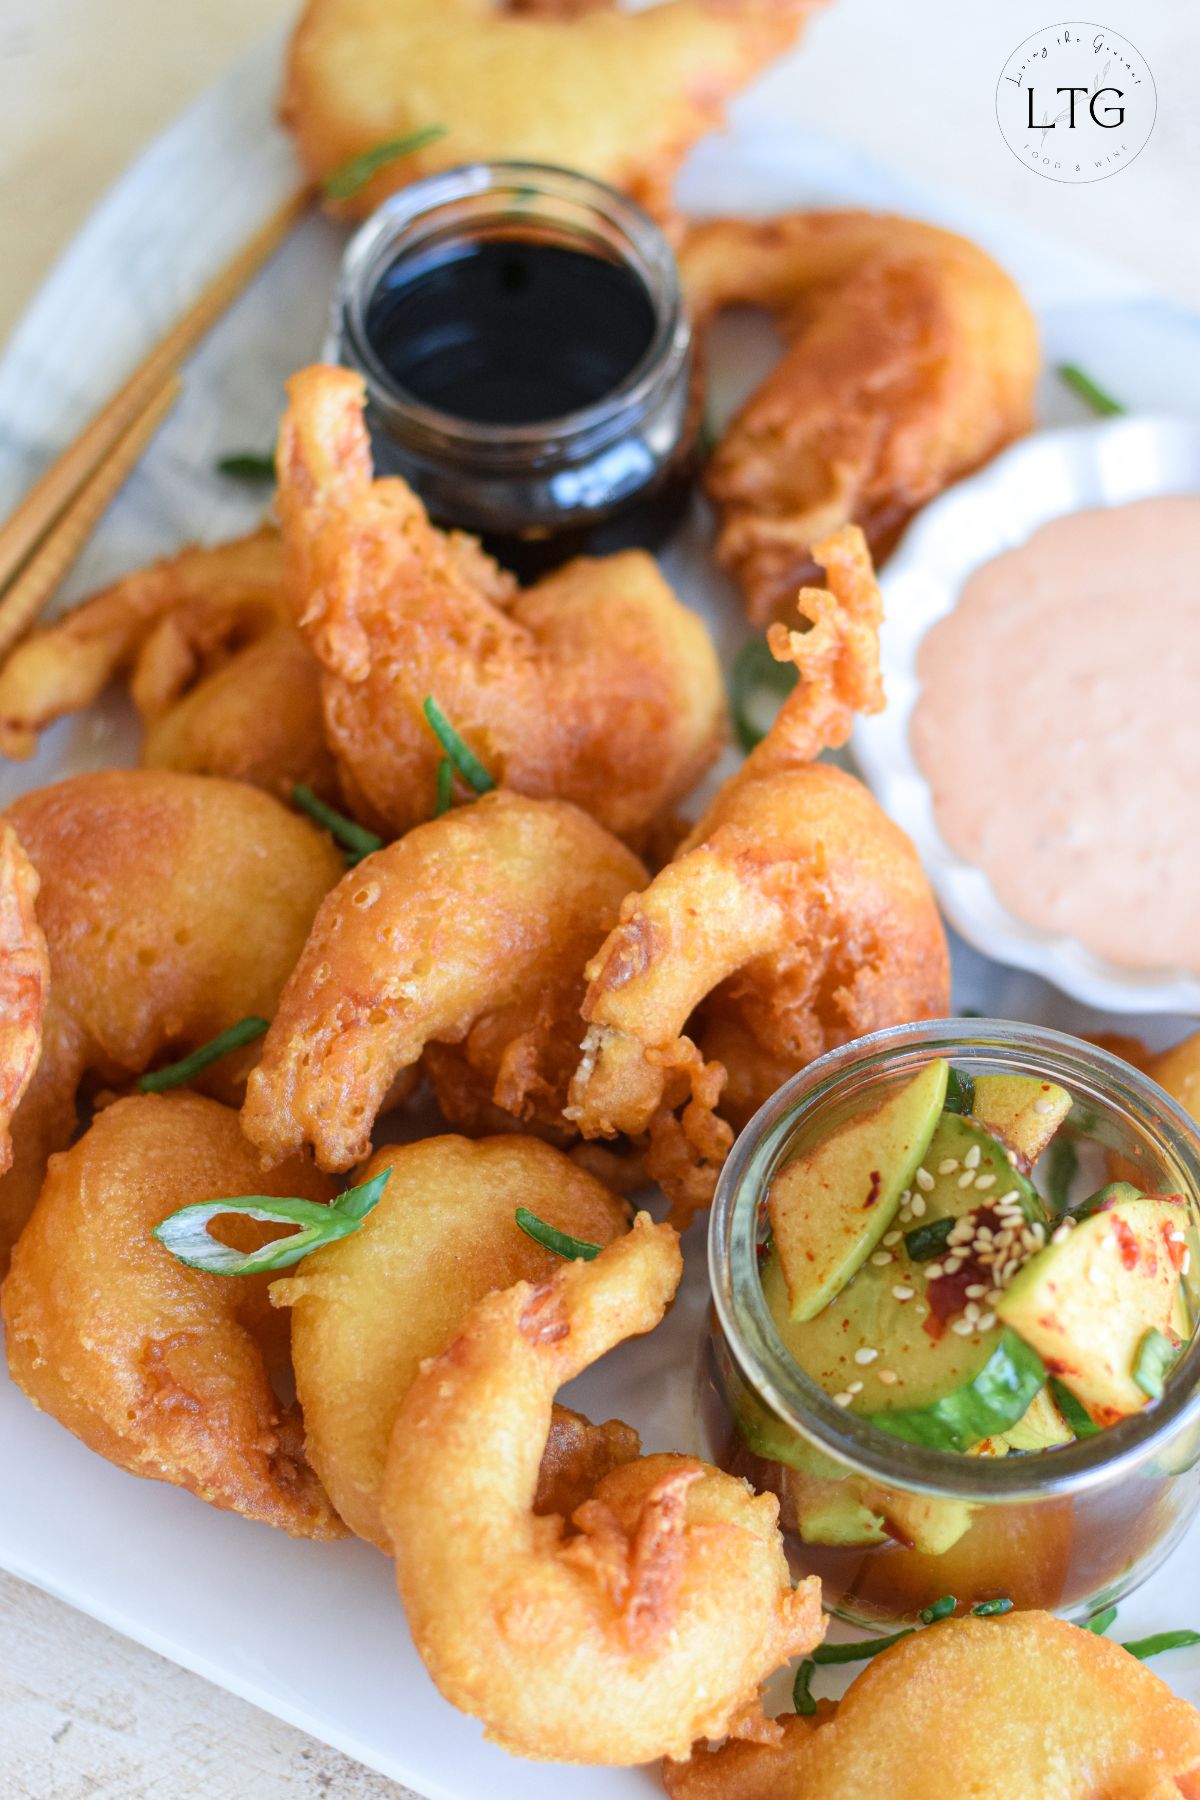
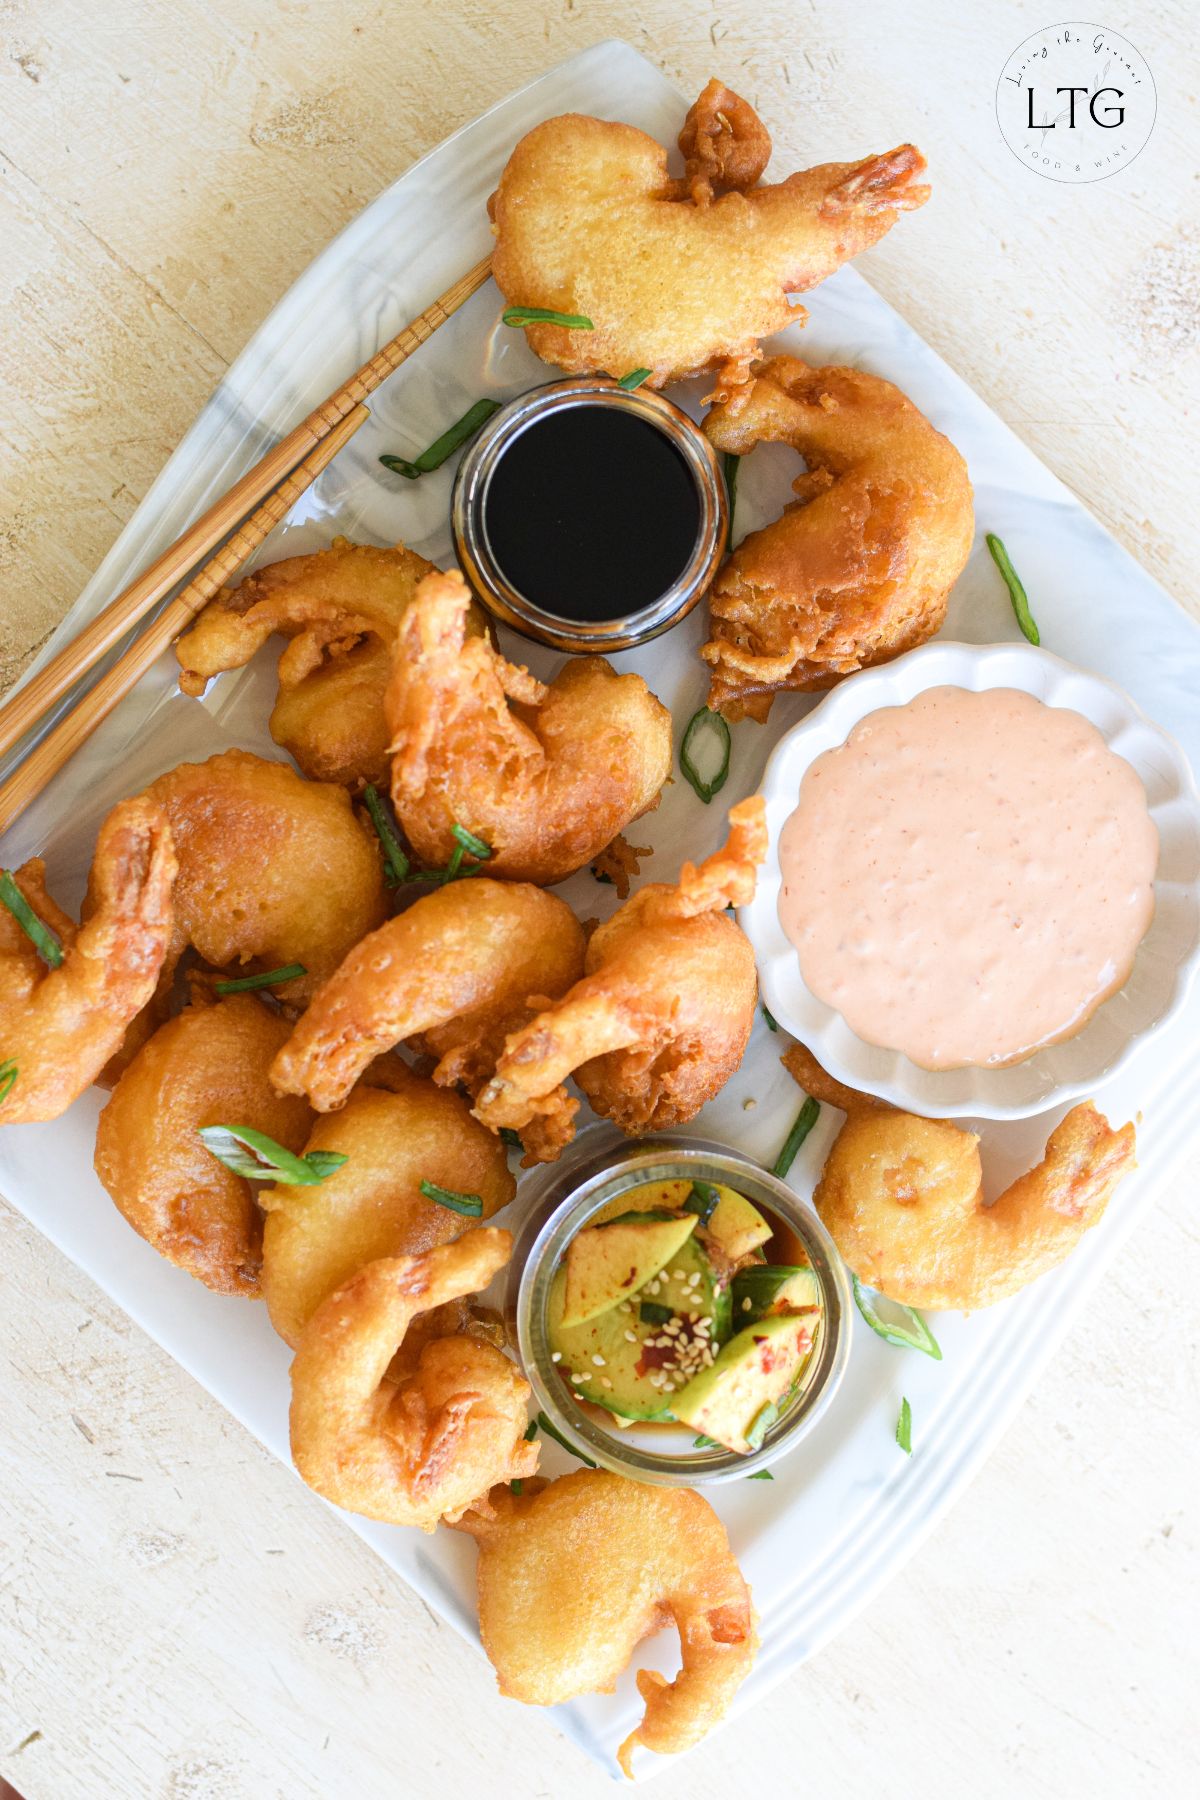
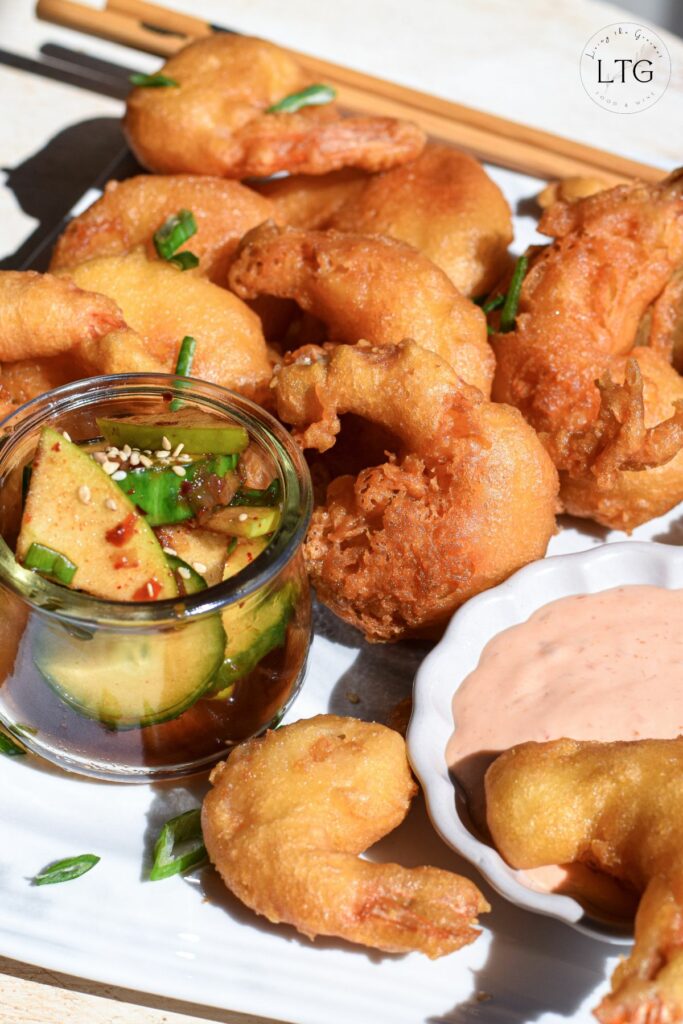
- The Deep-Fried Star of Japanese Cuisine: Aside from being a staple of Japanese cuisine, tempura has become a popular dish globally, with ebi tempura in particular stealing the show. In most instances, ebi tempura finds itself served alongside dipping sauces such as tensuyu or specialty soy sauce, with particularly common sides including rice, udon noodles, or rice bowls. It's also often seen filling in as the meat of sushi rolls.
Ingredient Checklist - Homemade Shrimp Tempura
- 3/4 cup all-purpose flour
- Note: All-purpose flour will get the job done just fine, though rice flour - the traditional base for the coating - will help achieve a lighter, crispier coating.
- Tip: The texture of the batter is what makes or breaks this recipe. So be sure to sift the flour before mixing, as this goes a long way to achieving a light batter. And before you ask, yes, sifting applies to rice flour as well.
- Substitution: If you have rice flour on hand, I do recommend using it, as it will make for a crispier tempura - and is common in traditional Japanese tempura.
- 3/4 cup cornstarch, divided
- Note 1: Before you ask, yes, potato starch is traditional, but cornstarch works just as well (maybe even a bit better!) in achieving a crispy coating. To cook crispy shrimp tempura, you 'must' use something to make it crispy up, and that means either cornstarch or potato starch.
- Note 2: Divide the cornstarch in ¼ cup for the batter, to help crisp during frying, and ½ cup for dredging the shrimp.
- Tip: Cornstarch is a key ingredient. Cornstarch helps to achieve a crispy coating and also helps prevent the tempura from becoming soggy.
- Substitution: Potato starch is a great alternative and is also used in Japanese cooking.
- 1 tablespoon baking powder
- Purpose: Leavening for the batter. A bit of lift and extra crispness.
- Tip: Make sure your baking powder is fresh. Expired baking powder simply doesn't do its job.
- Pinch of salt
- Tip: Keep it minimal. Tempura is meant to highlight the shrimp's natural flavor. You can always season after frying if needed.
- 1 large egg
- Tip: As I mentioned above, the batter should be ice cold, so this is one recipe where you do 'not' want to use room temperature eggs. Use eggs fresh from the fridge. The batter being cold helps to prevent it from absorbing excess oil.
- 1 cup pale lager or carbonated water
- Note: I'm using beer to help give the batter a bit of flavor. I honestly just can't resist a good beer batter - but it's the carbonation that's important for tempura.
- Note 2: But why? Simply because the air bubbles help to create a delicately textured, crunchy batter. Simple.
- Substitution: Almost any carbonated beverage. That means seltzer, sparkling mineral water, or beer. And yes, you could actually try using a sparkling white wine if you're feeling especially creative.
- Tip: Cold. It needs to be cold. Preferably ice cold. Remember, cold batter = crispier results. Yes, I'm harping on this because the quickest way to have subpar tempura is to 'not' use a cold batter.
- 1 lb.. large shrimp (peeled and deveined)
- Tip 1: Tails on. Leave tails for a traditional ebi tempura presentation.
- Tip 2: Slit the shrimp. Make small, shallow slits on the back of the shrimp and remove the vein. This slit also helps to prevent curling.
- Note: Dry them. Pat dry before dredging in cornstarch for better adhesion.
- ½ cup oil for frying (vegetable, canola, or peanut oil)
- Tip 1: Use a neutral, high smoke point oil. I'm using vegetable oil.
- Tip 2: Maintain oil temperature around 350°F. Too hot and the batter burns; too cool and the batter will absorb too much oil, becoming soggy.
Pro Tips for the Best Homemade Tempura Shrimp
Cooking crispy shrimp tempura is all about getting the coating right, because let's be honest, most fried food is pretty delicious - tempura or not. One of the best things about fried food is how the food beneath the coating is almost always moist and juicy. But, as I wrote above, what sets tempura apart is the texture and mild flavor of its crispy coating.
That means that cooking good tempura shrimp comes down to achieving that delicate, golden brown texture that 'makes' traditional ebi tempura, and that all comes down to technique. It's a popular dish for a reason - so let's get that technique right!
With that in mind, follow these tried-and-true tips for the most successful (and delicious) results:
- Always keep your batter cold
- Yes, I'm repeating myself (again). Keep the batter cold. A cold batter shocks the hot oil, which creates that signature light batter, giving the tempura its characteristic crunchy exterior. Chill your mixing bowl if needed.
- Dredge the shrimp in cornstarch before battering
- Cornstarch, or potato starch, is essential to both helping the batter cling to the shrimp and helping it crisp during frying. Don't skip this ingredient.
- Use a thermometer to maintain oil temperature
- Keep your frying oil steady at 350°F (175°C). Too hot, and the batter burns; too cool, and the shrimp absorbs oil and becomes greasy.
- Don't overcrowd the shrimp
- Have patience, and don't overcrowd the pan. Honestly, this is a rookie mistake, but one that's easy to make. Okay, overcrowding the pan traps steam and drops the oil temperature, which results in a soggy coating. Not good. There's no getting around that; preventing this means slowing down the frying process by cooking the shrimp in small batches while leaving about an inch of space between each shrimp.
- Use chopsticks to handle the shrimp
- I'll be honest, I love using cooking chopsticks (culinary chopsticks) whenever the opportunity presents itself, and this is definitely one recipe where they come in useful. Using chopsticks to transfer the shrimp to and from the oil helps to avoid breaking the delicate tempura batter.
- Work quickly and gently
- Be quick, because the tricky thing about tempura is that tempura batter absolutely hates sitting around. Prep the tempura mix just before frying and be very careful to avoid overmixing, which can create a heavy, dense coating - which is the opposite of what we're aiming for.
- Drain on a paper towel or wire rack
- Drain excess oil. Use paper towels or a wire rack (I would caution against patting them dry, as this can risk cracking the batter). Either way, just be sure to let that excess oil drip off. This helps maintain that crunchy batter.
- Serve immediately
- Tempura is best enjoyed fresh - as in right from the frying pan. Don't let it sit. Instead, get right to enjoying it.
- Store in an Airtight Container
- Leftover tempura can last about 3-4 days in an airtight container. Heat them up in a dry pan just until warm, and you're good to go.
How to Make Crispy Shrimp Tempura - Easy Recipe

- Prep Time: 10 minutes
- Cook Time: 20 minutes
- Total Time: 30 minutes
- Yield: 20 shrimp 1x
- Category: Main Dish
- Method: Fry
- Cuisine: Japanese
Ingredients
- 3/4 cup AP flour
- 3/4 cup cornstarch divided (1/4 cup for the batter and 1/2 cup for dredging the shrimp)
- 1 tablespoon baking powder
- Pinch of salt
- 1 large egg
- 1 cup pale lager or carbonated water
- 1 lb. large shrimp
- Oil for frying
Instructions
- In a large bowl, whisk together flour, ¼ cup cornstarch, baking powder, and salt.
- Add egg and pale lager. Whisk until the batter is light and smooth.
- I think using a wok for this recipe is best, but if you don't have one, you can certainly use a pot for frying.
- Heat about 2-3 inches of oil until it reaches 350 degrees F.
- Fry about 4-5 shrimp at a time until the internal temperature reaches 143 degrees F. and the shrimp is golden and crispy.
- Drain on a paper towel-lined plate to absorb any excess oil.
- Serve and enjoy!
And that's our Homemade Tempura Shrimp. If you enjoyed this recipe or have any questions or suggestions, be sure to let us know in the comments. We always love hearing from you!
Happy Cooking!


Leave a Comment