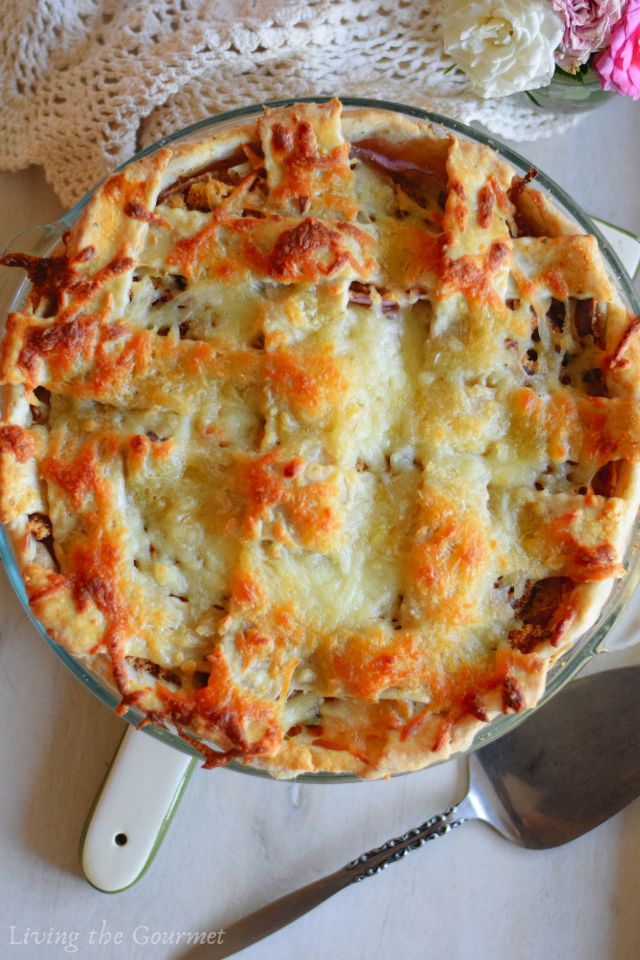
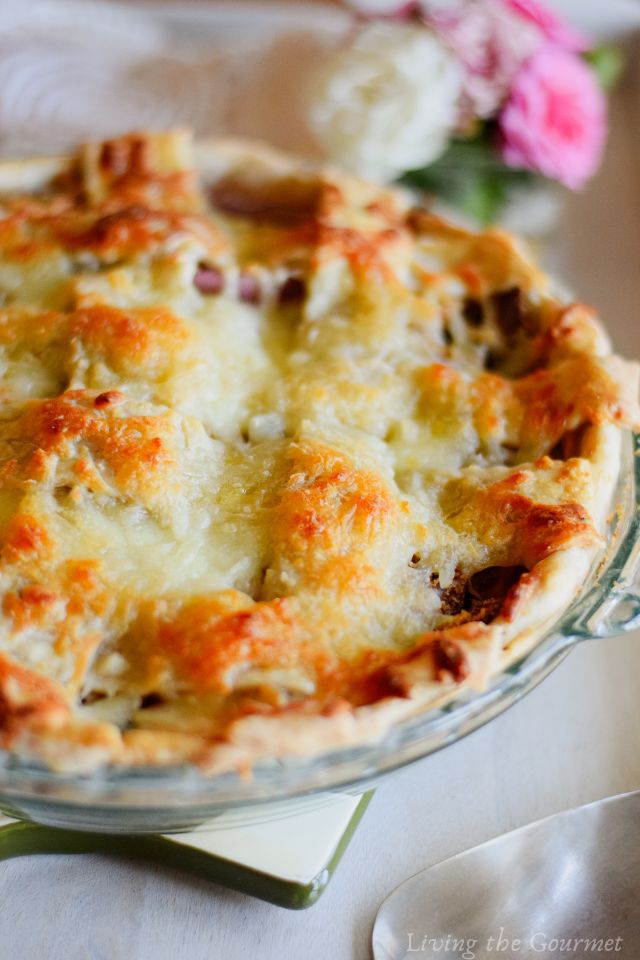
Our Italian Style Heirloom Tomato Pie combines the rich, buttery goodness of a flaky homemade crust, with layers of fresh tomatoes, mozzarella cheese, and fresh basil. Baked to crisp and golden perfection, this pie is perfect as a light dinner, or as a hardy side to the main course. As delicious as it is elegant, and using only simple ingredients, every home cook should have this pie in their repertoire.
The homemade crust is the star of the show here. The buttery flavor melds deliciously with the fresh basil and mozzarella cheese, and really soaks up the flavors of the tomato mixture beautifully, while the sprinkled parmesan forms a nice coating over the latticing. However, as delicious as this pie is, the best part is that once you have the process down for making the crust, the rest of the recipe is a breeze.
Now, without further introduction, let’s get to it.
What to Expect – Recipe Overview
All right, you’ve made it this far and are still reading. That means you probably have a few questions – perhaps you’re wondering what this recipe tastes like, or how hard it is to make? Or maybe you’re wondering if this recipe is make ahead-friendly or what the process is like, or what it pairs well with?
For the answer to those questions and more, read on.
Taste and Texture:
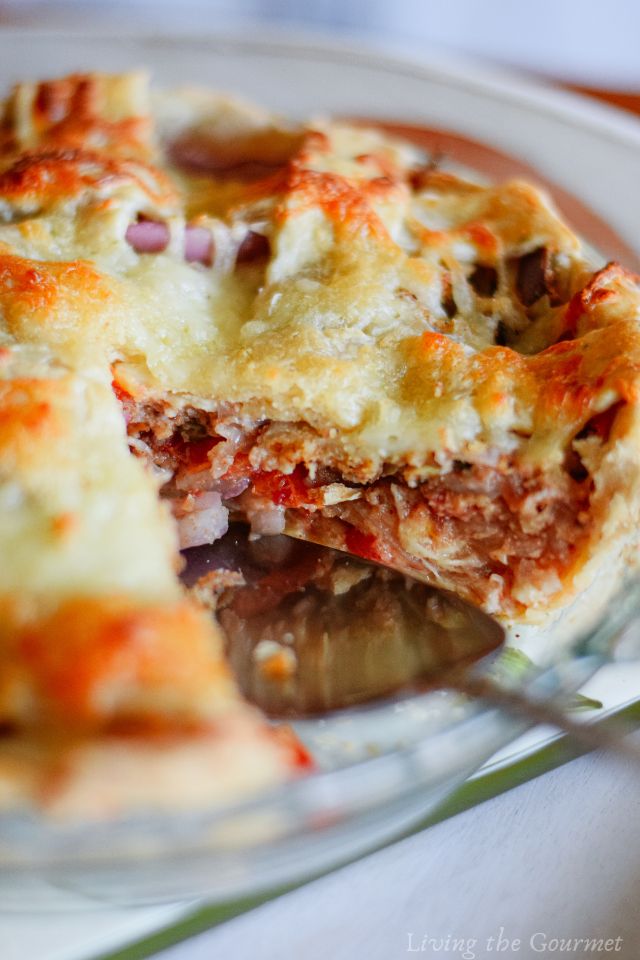
The pie starts with a homemade crust, which should bake up rich, buttery, and flaky, with a lovely golden hue. However, it’s what is inside the crust that makes the pie. Between slices of fresh heirloom tomatoes, we layer mozzarella and parmesan cheese, with fresh basil, capers, and toasted breadcrumbs. This creates a delicious combination of cheesy goodness, a hint of sweetness from the basil, and some savory brininess from the capers, carried on the flaky, buttery crust.
Difficulty Level:
Moderate. I won’t call this recipe hard, but I cannot call it easy either. Making pie crust from scratch can indeed be a bit involved, as you’ll have to grate butter, form the dough, chill it, and then prebake it. That said, this process should be simple enough for most home cooks with some baking experience. The filling, meanwhile, is simple enough to prepare – and can you think of it essentially as making a pizza.
Preparation Process:
While this recipe isn’t complicated, the process is ‘a bit of a process,’ involving several steps that simply cannot be skipped or glossed over. For example, you can’t skip or streamline grating the butter, since this ensures even distribution through the dough, which in turn ensures the dough bakes up flaky. Giving the dough time to chill in the fridge, likewise, cannot be skipped. Similarly, if you skip prebaking the dough, it will become soggy during baking. And all of that occurs before we’ve even begun with the tomato filling. That said, none of these steps are difficult or complicated, but the process can indeed be a process.
Make Ahead:
This pie is a great make-ahead recipe, as it can sit in the fridge for about three days, tastes great cold, and is a breeze to heat up in the oven. Just pop it in the oven for a few minutes at three-fifty, or in the toaster oven for a few minutes on medium, and you’re good to go.
Storage:
You can leave it in the pie plate and cover it with either cling wrap or aluminum foil and it will keep like that in the fridge for a few days. Alternatively, you can seal the pie in an airtight container and it should keep for about five days. I would not recommend freezing it.
Pairings:
I would recommend serving this pie as a dinner side with seared steaks or a Sunday roast. This pie can also serve as a light main course alongside leafy green salads, light pasta dishes, or even as a starter with charcuterie. As a wine pairing, consider a decent pinot grigio or a chardonnay.
Ingredient Checklist – Everything You’ll Need
As mentioned above, this recipe uses only simple, affordable ingredients that are readily available at your local supermarket.
With that in mind, here’s everything you’ll need to prepare today’s recipe.
For the Crust:
- 3 cups flour
- Tip: All-purpose flour is all we’re looking for here.
- Substitution: Your gluten-free flour of choice will also work just fine.
- 1/2 cup unsalted butter (1 stick), grated
- Note: As mentioned above, we’re grating the butter to ensure even distribution through the dough.
- Tip: I recommend using chilled butter as it is easier to work with, and will help achieve a flaky crust (more on this below).
- Substitution: Your dairy-free butter of choice can indeed work, but be sure it has a fat content similar to butter, as it is the butter’s fat that makes the crust flaky and textured.
- 1 egg
- Note: Helps to bind the dough together, and also adds fat.
- 3/4 to 1 cup cold water
- Tip: Add the water gradually, and add no more than you need to form the dough. Too much water means a soggy dough.
- Note: I do suggest using ice water. The colder the water, the flakier the crust. And yes, that means that chilling the dough in the fridge also helps to achieve a flaky crust (more on this below).
- 1 tsp. salt
- Note: Plain table salt is all we’re looking for here.
- 1 tsp. black pepper
- Tip: For a bit of earthy and savory depth.
- 1/4 cup grated Parmesan or Romano cheese
- Note: Adds savory depth and a bit of saltiness to the crust.
- Substitution: Feel free to use any hard, aged grating cheese for this. What we’re looking for is the savory, salty notes of the cheese.
- 1 egg (beaten, for egg wash)
- Note: Works to give the crust a golden finish. I would ‘not’ suggest omitting the egg wash, as it also helps to crisp the exterior of the crust.
For the Filling:
- 2 firm heirloom tomatoes, sliced 1/4 inch thick
- Substitution: Any large, firm tomatoes will work. Again, the large, firm slices are key.
- 3–4 garlic cloves, chopped
- Note: While I consider the garlic a key ingredient, feel free to adjust it based on your preference.
- 5–6 fresh basil leaves, chopped
- Note: Adds a sweet anise flavor and a bit of color to the pie.
- Substitution: Parsley or cilantro will work, though I do think basil brings the best flavor to this recipe.
- 1 tbsp. capers
- Tip: Do ‘not’ rinse your capers. I don’t know how or why this trend started. On their own, capers are bitter. Full stop. There is ‘nothing’ palatable about un-brined capers. The flavor of capers ‘is’ the brine. The salty, tangy, slightly acidic notes of the brine ‘is’ what capers bring to a recipe. This is why recipes so often call for a spoon of caper juice.
- Note: This brine flavor melds beautifully with all sorts of Mediterranean cuisine. That brininess complements things like garlic and herbs, charcuterie, hard cheeses, and herbed meats. To fully enjoy your capers, stop rinsing them and instead use the brine to its fullest.
- 1 cup breadcrumbs
- Tip: Toasted breadcrumbs add texture to the filling.
- 1 medium red onion, thinly sliced
- Tip: For a bit of color and subtle sweetness.
- Substitution: Sweet or white onions would also get the job done.
- 2 tbsp. olive oil (plus more for drizzling)
- Note: Skip the cooking oil and opt for a decent olive oil in this instance. You want the flavor of the olive oil to come through in the breadcrumbs.
- 4 oz. shredded mozzarella cheese
- Tip: I don’t generally recommend using fresh mozzarella in cooked recipes, as all of the subtle nuances that ‘make’ fresh mozzarella are generally lost through cooking.
- 1/2 cup grated Parmesan or Romano cheese
- Tip: As above, we’re using parmesan to bring a bit of savory and salty depth to the filling.
Additional:
- Sesame seeds (optional) for garnish
- Note: Purely for garnish.
Tips for Making a Homemade Pie Crust
The crust is the star of the show in my opinion, so getting it just right matters. Here are a few tips for doing exactly that.
- Cold Ingredients
- Cold butter: Use your butter or shortening straight from the fridge. Do not let it warm at all before using it. Sometimes I will even use frozen butter, and grate that into the dough. What this does is it creates pockets of fat that in turn lead to a flaky crust.
- Cold water: Using cold water lowers the overall temperature of the dough, which in turn helps to prevent the butter from melting into the flour.
- Don't Overwork the Dough
- Mix minimally: Mix the dough only until the butter and flour are combined while adding only enough water to bring the dough together. Overmixing or overworking the dough will add too much air into the batter, which will result in a hard, dry crust.
- Grating butter: As mentioned above, grating the butter into the dough frozen is also a great way to achieve a flaky crust, not only does the frozen butter resist melting, but it also ensures a maximally even distribution through the dough.
- Chill the Dough
- Refrigerate before rolling: Once the dough has come together, form it into a ball, as described in the recipe card, and then let it chill in the fridge. Why? Chilling the dough helps to firm up the fat, making it easier to roll, while also preventing shrinkage during baking.
- Roll Evenly
- Roll from the center out: To keep the dough even, roll from the center outwards in all directions. Rotate the dough as you go to maintain a round shape.
- Dust with flour: Sprinkle the surface lightly with flour to prevent sticking, but don’t use too much, or the dough can dry out.
- Prevent Sogginess
- Blind baking: For pies with juicy fillings (and that includes today’s tomato pie), you want to prebake (blind bake) the crust for about ten to fifteen minutes right before adding the filling. This prevents the bottom of the pie from becoming soggy.
- Add Flavor to the Dough
- Cheese or herbs: For savory pies, such as today’s, that means incorporating ingredients like grating cheese, herbs, or spices directly into the dough. No one wants a bland, tasteless dough.
- Sweet crusts: For dessert pies, adding flavor usually means a bit of sugar or seasonings such as cinnamon or nutmeg.
- Use Pie Weights
- Weights: You do ‘not’ want the crust to puff up during blind baking (prebaking). To prevent this, you can use specialized pie weights, but dry beans or dry rice will also work just fine. That said, be sure to line the dough with parchment paper before adding the weights.
- Test for Doneness
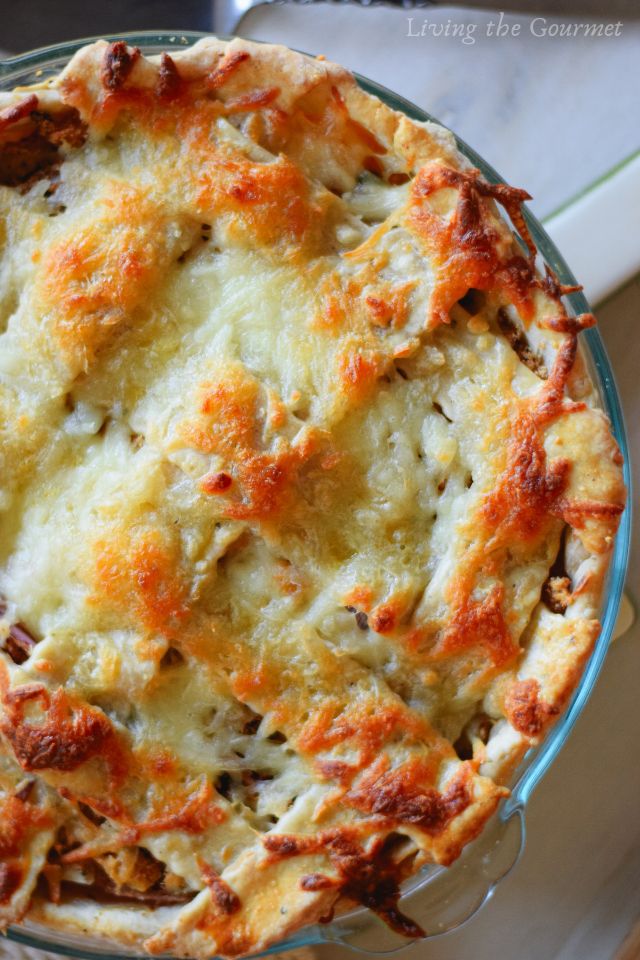
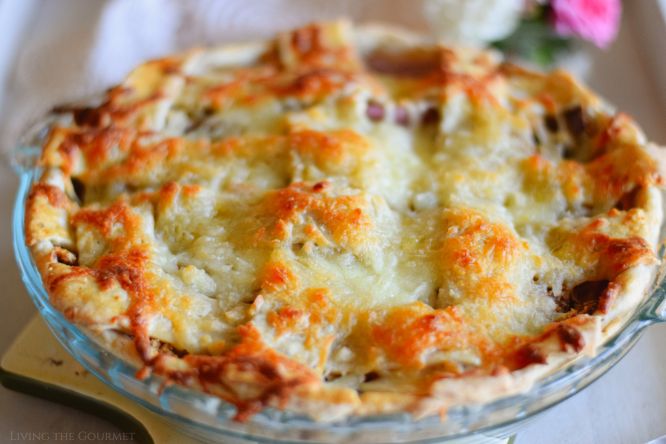
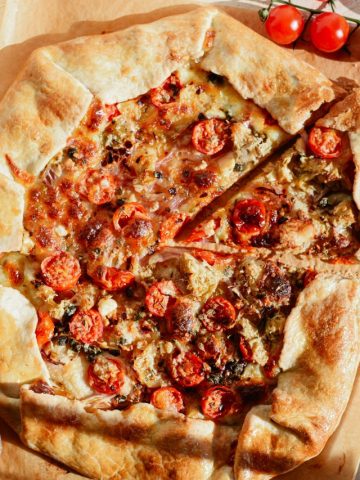
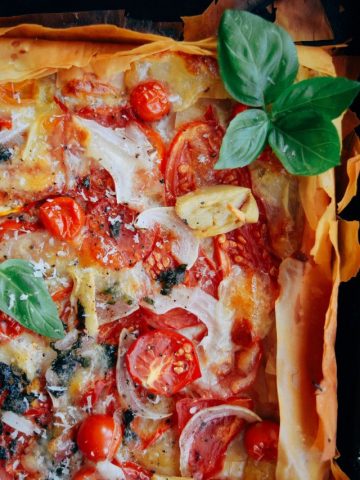
- Golden color: Your crust is ready when it’s a lovely golden-brown color, as shown in the pictures here. Even browning, with a background golden hue, not only makes for a lovely presentation but also signifies that the crust will have a flaky texture.

Italian Style Heirloom Tomato Pie
- Total Time: 2 hours
- Yield: 4-6 servingers 1x
Ingredients
For the Crust:
- 3 cups flour
- 1/2 cup of unsalted butter (one stick), grated
- 1 egg
- 3/4 to 1 cup of cold water
- 1 tsp. salt
- 1 tsp. black pepper
- 1/4 cup of grated Parmesan or Romano cheese
- 1 egg beaten for eggwash
Filling for the Pie:
- 2 firm heirloom tomatoes
- 3 - 4 garlic cloves, chopped
- 5 - 6 fresh basil leaves, chopped
- 1 tbs. capers
- 1 cup of breadcrumbs
- 1 medium-sized red onion, thinly sliced
- 2 tbs. olive oil and more for drizzling
- 4 oz. mozzarella, shredded
- 1/2 cup of Parmesan or Romano cheese, grated
Instructions
For the crust:
- Add the salt, black pepper, and grated cheese to the flour and toss.
- Grate the butter and add to the flour and toss.
- Beat the egg with 3/4 cup of cold water add to the flour mixture and form into a ball.
- If the flour mixture is not coming together add a little more water.
- Refrigerate for about 1 hour or more.
Filling and Assembly:
- Preheat Oven 350 degrees F.
- Gently heat a large cast iron pan and add the cup of breadcrumbs.
- Drizzle the breadcrumbs with the olive oil and toss. Be sure to watch over the breadcrumbs so that they do not burn but rather become a beautiful golden color.
- Place the sliced onion in a large bowl and add the capers, toasted breadcrumbs, garlic, basil, and grated Parmesan cheese and toss.
- Slice the tomatoes to 1/4 inch thickness.
- Cut the dough in half.
- Roll out one half of the dough to a 1/4-inch thickness and place in a 9-inch pie dish. Polk the bottom with a fork.
- Place in the preheated oven for about 10 minutes to gently bake the crust.
- Remove from the oven and build the pie.
- Place some onion mixture, followed by the grated mozzarella followed by the tomatoes. Repeat this process until the ingredients are used up. Drizzle the pie with one or two tbs. of olive oil.
- Save a bit of the mozzarella for the top of the pie.
- Roll out the other half of the dough and lattice the top of the pie.
- Brush the pie top with the eggwash, followed by the extra mozzarella.
- Bake for 40-45 minutes until the pie is a beautiful golden color.
- Prep Time: 15 minutes
- Inactive Prep Time: 1 hour
- Cook Time: 45 minutes
And that’s our Homemade Heirloom Tomato Pie. If you tried today’s recipe, or have any questions or suggestions, be sure to let us know in the comments below. We always love hearing from you! Happy Cooking!
Formerly titled Italian Pie, this post was originally published October 16, 2012 and has been updated September 18, 2024.
0

Recetario Spanglish para mis hijos says
Beautiful pie! Catherine, I have a tip when you use tomatoes in a pie, you can also spread bread crumbs below them to absorb the humidity. Blessings,
Pam says
It looks delicious! I made this so much this summer, we loved it! Have a good day!
Grace says
I am so making this for dinner tonight - along with some chicken/pesto sausage. Dynomite!
Fuat Gencal says
Ellerinize sağlık. Çok leziz ve güzel görünüyor.
Saygılar.
Sandee says
I would love this Catherine. It looks and sounds mouth watering. That's the very best.
Have a terrific day. 🙂
Dieter Moitzi says
This looks just awesomely delish! And for once, you don't trap me in the morning, but in a famished pre-dinner mood! Naughty girl, lol! I'd perhaps add some tuna, but even without, this must be very good. xoxoxo D.
Katerina says
Garlic, cheese and oregano sound like perfection to me Catherine! This is a beautiful savory pie!
Gloria says
really delicious!!
Stephen says
A great site to help give you some exposure and link back to your site is http://www.flauntmyfood.com just wanted to share, cuz i think ur stuff is great!
María says
Una maravilla de pie. Me parece apetecible y delicioso para cualquier momento del día. Besicos.
Dining Alone says
This is a great vegetarian dish that would be very filling! What a great idea.
Lyndsey Chapin says
What a great pie...I would totally like this anytime!! Very satisfying! 😀
A Mom says
love to try this, looks so yum!
manu says
HI, I like this pie and I love your blog and your recipes.
Manu
http://cookingmanu.blogspot.com
Kim Garceau says
This looks really good, I love savory pies!
Debbie says
I love this....it looks delicious!
Dana @ This Silly Girl's Life says
Looks so good! Always wanted to try something like this.
sofiaaurora says
Que bueno, con tomate nunca lo he probado, pero por la foto se ve delicioso, besos
Sofía
milideasmilproyectos.blogspot.com
Maureen | Orgasmic Chef says
What a great looking pie! Fresh tomatoes will be at the markets soon and this pie will be MINE! 🙂
Pegasuslegend says
Always wanted to ttry this you just gave me inspiration looks awesome!
Medeja says
Tomato and mozzarella is such a great combination! Lovely filling for the pie.
Reeni Pisano says
What a wonderful tomato pie Catherine! It looks very hearty and so tasty. Hope you're week is going good! xoxo
Angela says
I love this, the only problem is finding really delicious tomatoes around here:)
Joanne says
I love this savory pie!
Juliana says
I love your crust with oregano...perfect with the tomato filling. Looks delicious!
Hope you are having a fantastic week Catherine 🙂
Curt Iffert says
I love the golden color of this one! wow... sorry havent been around much.. drive back and forth to work is over an hour each way,having a hard time getting comments in thanks so much for your visits.. love your recipes! Curt
Rose says
Yum! There are so many ways that you can customize the filling.
allotments4you says
I love the thought of garlic in the pie crust...definitely one to remember!!