
There are very few lunches as universally beloved as a grilled ham and cheese sandwich. This is one of the sandwiches that I grew up on: buttered bread toasted until it crackles, thin-sliced deli ham, and cheese melted to gooey goodness. This is a quick and comforting meal that's supremely satisfying, which is exactly why this particular sandwich has never gone out of style.
Here at Living the Gourmet, we absolutely love taking classic recipes and giving them a few gourmet upgrades. It's in our name, after all. Our version of the grilled ham and cheese sandwich features layers of melted provolone with sliced deli ham and a medley of sweet and savory caramelized onions that we've finished with apple cider vinegar and honey. On the side, we're pairing the sandwich with a spicy mayo dip that we've prepared with chili garlic sauce, which turns every bite into something deliciously memorable.
Best of all, this sandwich is blissfully easy to prepare. With that said, there are common pitfalls when preparing a homemade grilled sandwich, and I'll be covering them all, as well as providing some tips and tricks so that this sandwich comes out right every single time. Read on for tips on how to get a crisp, evenly golden exterior, cheese that is fully melted all the way through, and ham that is hot in the center, never cold. We'll also be covering expert sandwich-making technique, the best bread and cheese choices, my take on the mayo-versus-butter question, and, finally, how to make a batch of these sandwiches in the air fryer.
Jump to:
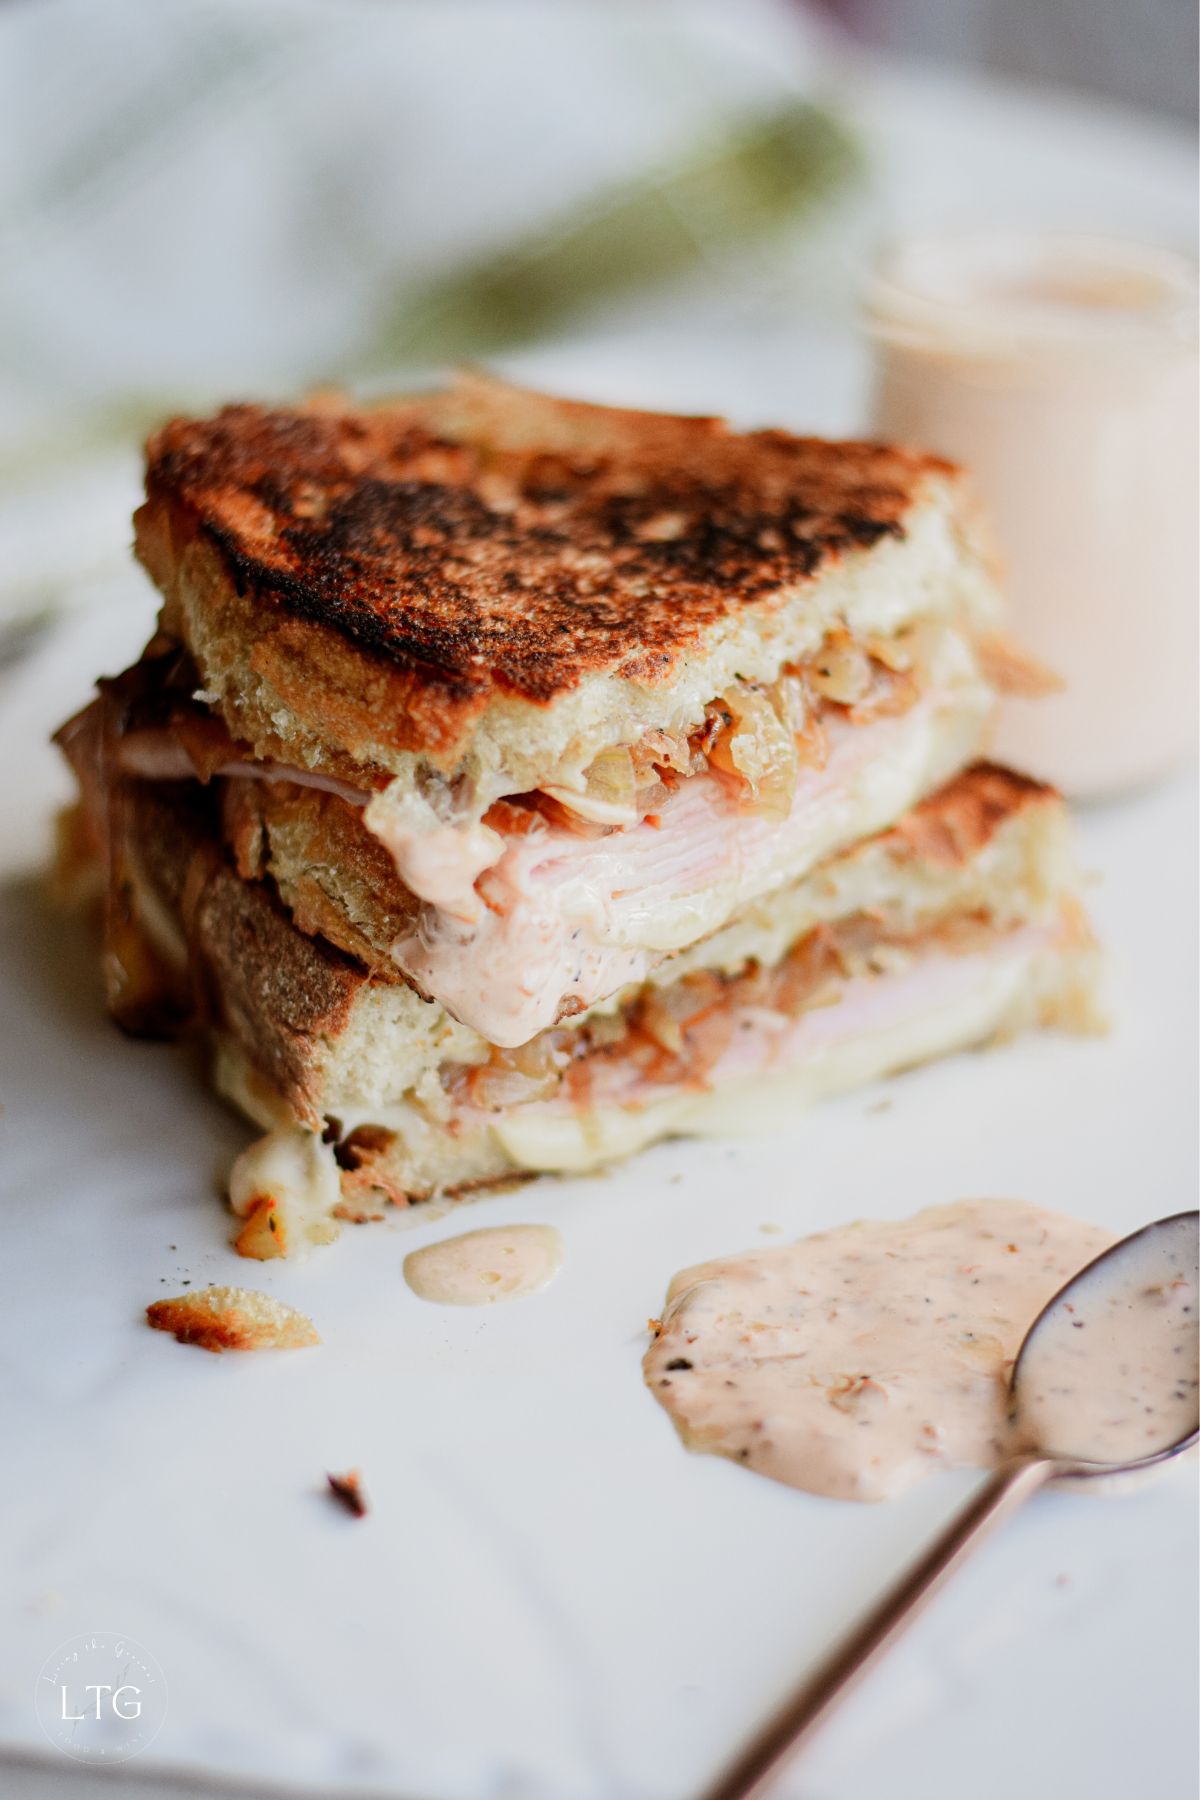
The Secret to a Perfect Grilled Ham and Cheese Sandwich
Avoiding the "Cold Ham, Hot Bread" Trap
Have you ever bitten into a grilled ham and cheese that has a perfectly toasted crust only to find lukewarm ham in the middle? If so, you have encountered one of the most common pitfalls with this type of sandwich. Cheese melts at a fairly low temperature, but a thick stack of cold deli ham straight from the fridge takes a good bit longer to warm through. This means that by the time the meat in the center has heated up, the bread has often gone from golden brown and crisp to dark or even burnt, with cheese likely having begun to scorch. And turning up the heat to try to warm the ham faster only makes things worse.
Thankfully, the fixes for the issue are super simple. Here they are:
- The Quick Skillet Flash: Before assembling the sandwich, heat the ham itself. To do this, lay the ham in a warmed skillet for about 15 to 30 seconds per side, and then assemble the sandwich. We are not looking to brown the ham. Instead, we're only looking to take the chill out of the ham. By warming the ham, that means that the inside of the sandwich will only take a few minutes to warm up so that the bread and the cheese finish at roughly the same time as the rest of the filling.
- The Ribboning Technique: Rather than layering the ham in flat, dense layers in the sandwich, I recommend that you fold each slice loosely to create ribbons and then pile those onto the bread. We're doing this to create air pockets between the folds to let heat move through the sandwich's filling much more quickly than through a tightly packed slab of flat-layered ham. Ribboning the ham also gives the sandwich a fuller, more generous appearance, as well as a softer bite, which contrasts beautifully with the crisped bread.
If you follow these two pieces of advice, you can confidently grill the sandwich over gentle, medium-low heat, which is the most important key to an evenly golden, crispy ham and cheese sandwich instead of one that is scorched on the outside and cold on the inside.
Sandwich Anatomy: Layering for a Crisp, Never-Soggy Sandwich
The order in which you layer this sandwich, and others, is absolutely vital for the sandwich's texture from top to bottom. For this particular sandwich, this is the order I recommend, going from the bottom to the top:
- Starting with the bottom bread slice, butter or brush the bread with mayo on the outside of the bread.
- Layer on the first cheese slice.
- Layer on the warmed ham ribbons.
- Then add the caramelized onions, or pickles, and other add-ins.
- Layer on the second cheese slice.
- Then close with the top bread slice, buttered or brushed with mayo on the outside.
Why This Order Works: By setting the cheese over both sides of the bread, we create a buffer between the bread and the moister fillings. Ham, and especially the caramelized onions, carry a lot of moisture, and when they sit directly against the bread, that moisture steams into the crumb and softens it - which can risk making the interior of the bread soggy. By contrast, with cheese on both sides of the bread, the fillings are tucked into the middle, while the cheese melts against the bread, helping it to stay crisp and preventing sogginess. As a nice bonus, the cheese on each side acts as a glue, holding the whole sandwich together so it doesn't slide apart when you flip or slice it.
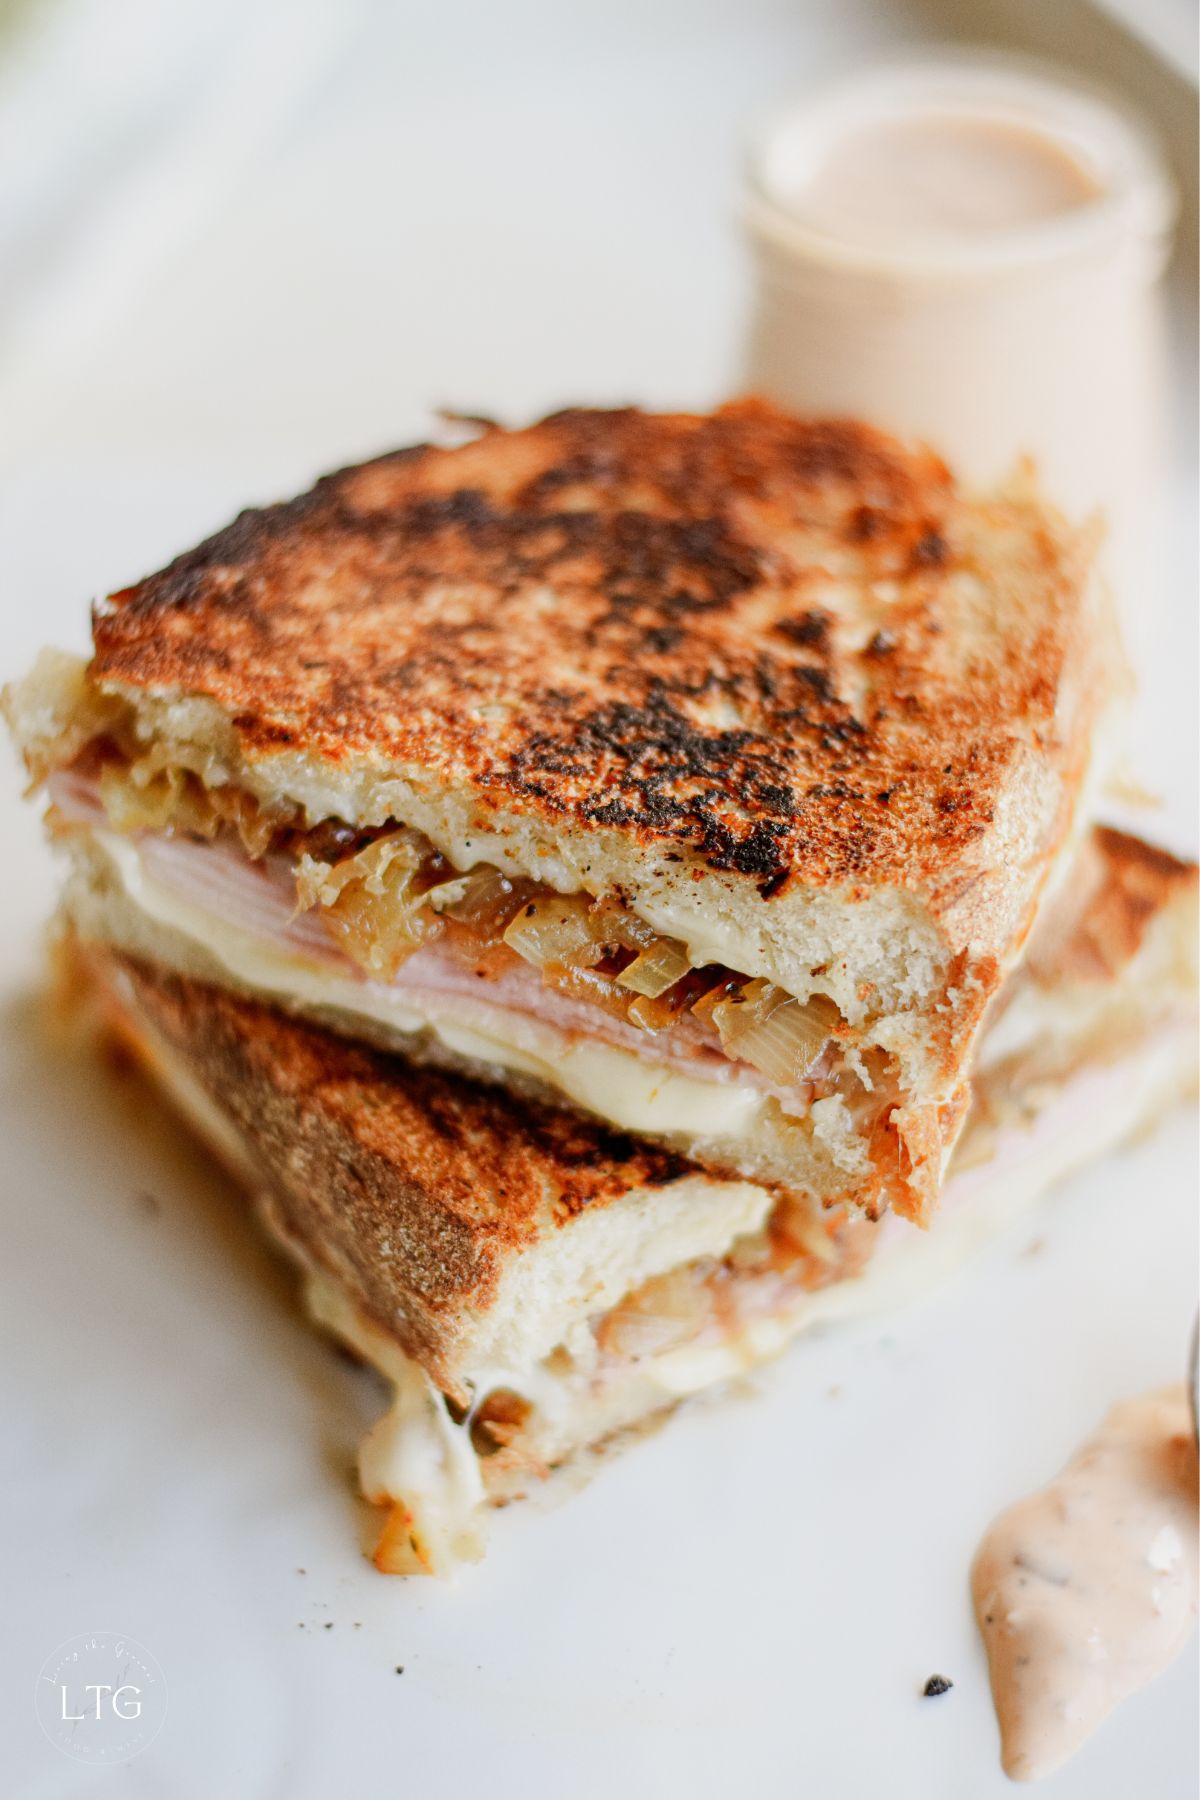
Ingredient Guide: How to Build the Best Grilled Ham and Cheese
Choosing the Right Bread
- My Top Picks: Thick-sliced Italian bread or an artisan sourdough would be my top recommendations for this type of sandwich. A grilled ham and cheese with caramelized onions is a very hearty sandwich, with a decent amount of moisture, so you really want a bread that is sturdy enough to hold the fillings and absorb the moisture without the bread collapsing, tearing, or sogging through. In terms of slices, aim for at least half an inch in thickness, which is thick enough to stay tender inside while the outside crisps, but not so thick that the heat cannot reach the center or that every bite is just bread. Sourdough will add a pleasant tang to the flavor, which plays deliciously with the onions.
- My Top Substitutes: Brioche would be my go-to and would make for a thoroughly indulgent sandwich with a good bit of extra richness. Ciabatta would also be great, giving a chewy, crackly crust. Rye is a classic choice for ham and pairs especially well with Swiss cheese or Gruyère. Avoid any thin, soft sandwich bread, as it will become soggy or burn before the filling heats through.
The Best Cheese for Grilled Ham and Cheese
For a grilled ham and cheese, as with grilled sandwiches in general, you want a cheese that melts smoothly and that has enough flavor to stand up to the ham. These are my personal favorites for this recipe:
- Provolone: It's what I've made this recipe with, and it was a deliberate choice on my part. Provolone is mild, creamy, and has exceptional meltability, and features an irresistible cheese pull. It has a gentle flavor, but won't be overpowered, and won't itself be overpowering, and this allows it to complement the ham and caramelized onions deliciously, without either disappearing into the background or stealing the limelight.
- Gruyère or Swiss: These are the classic pairings for a ham and cheese sandwich, and are also the cheeses that most frequently appear in grilled ham and cheese. They have a nutty, slightly sweet profile that really works nicely with ham, and both tend to melt beautifully. That said, gruyere is richer and slightly more complex than Swiss, which tends to be the milder of the two. Swiss is also typically more budget-friendly.
- Medium-Sharp Cheddar: If you want a bolder sandwich and don't mind the cheese standing at the forefront in terms of flavor, medium-sharp cheddar can be a great choice. With that said, aged cheddars tend to become oily when melted, so I would opt for a medium-sharp variety instead for a smoother melt.
→ Pro-Tip: If you are feeling especially creative, consider mixing and matching cheeses, such as provolone on one side with cheddar cheese on the other side can be delicious.
Choosing the Right Ham
For me, this is an easy one - thinly sliced deli ham wins hands down, as it is perfect for ribboning. Black Forest ham brings a smoky, savory depth that really works well with the caramelized onions, while honey ham adds a bit more sweetness. With that said, this sandwich is one of the most delicious ways to use up leftover holiday spiral ham, but be sure to slice it as thinly as you can manage and give it a quick flash in the skillet.
Mayo vs Butter on the Outside of the Bread
This is one of the most enduring sandwich debates there is: whether you should spread butter or mayonnaise on the outside of the bread. Both have their merits, in my opinion.
- Butter: It's hard to beat butter's rich texture and buttery flavor. That said, the downside is that butter contains milk solids that brown very quickly and can burn before the sandwich is heated through, especially if using higher heat than the recommended medium-high. Another downside is that butter is harder to spread evenly across the bread.
- Mayonnaise: Since mayo is mostly made of oil and eggs, it spreads easily and evenly over the bread, and browns much more evenly than does butter, with less risk of burning. That said, mayonnaise has a much milder flavor than does butter.
- Verdict: In truth, it comes down to preference. If you value a rich, buttery flavor, then opt for butter. If you value a more even spread and less risk of burning, then opt for mayonnaise.
→ Pro-Tip: Use both. Brush a very light coating of mayonnaise on the outside of the bread for an even, crispy crust, and then add a pat of butter to the pan for buttery flavor. This is how you get the best of both worlds. With that said, I'm using butter as I tend to value rich, buttery flavor, while paying a little extra attention to precise temperature to ensure the sandwich doesn't burn.
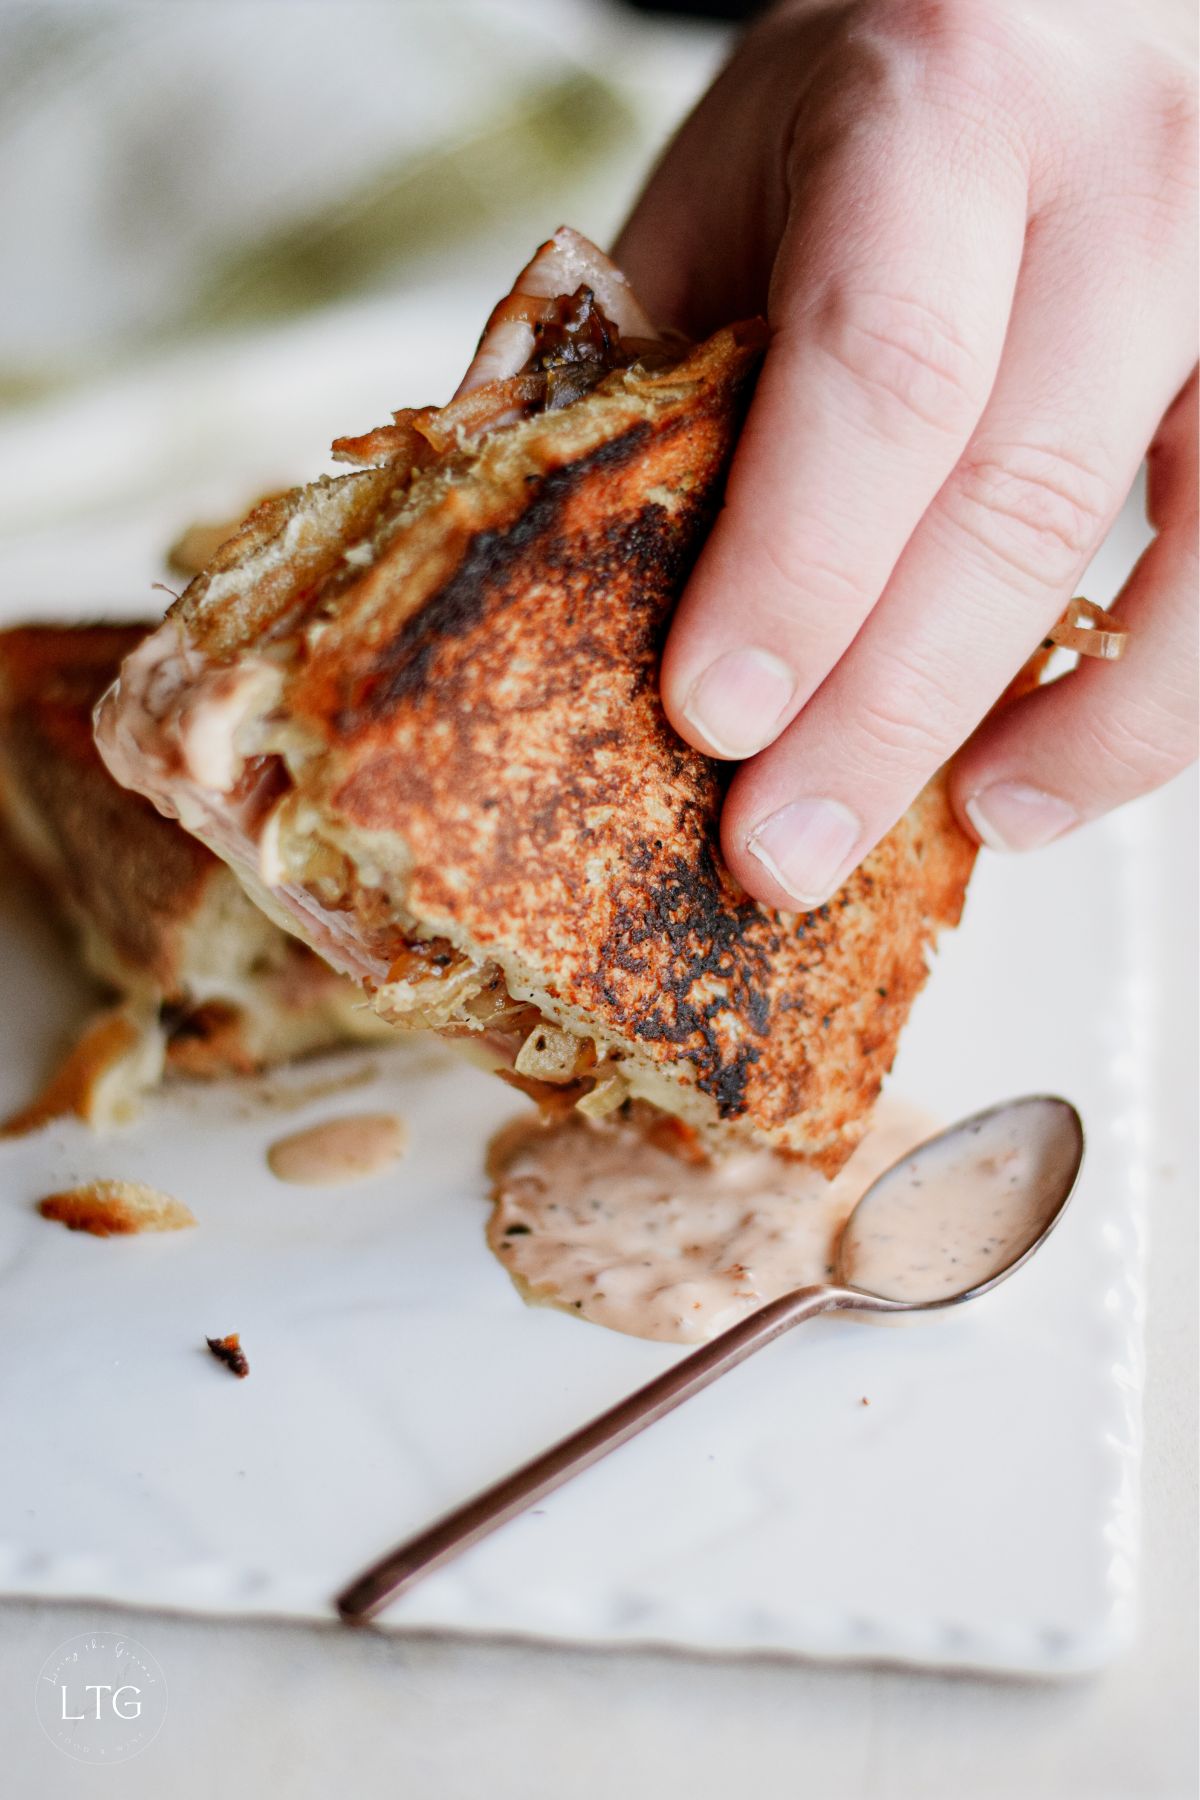
Gourmet Add-Ons and Variations
Sweet and Savory Caramelized Onions (Today's Recipe)
The caramelized onions, in my opinion, are what take this sandwich from everyday to gourmet. Sliced thin, we let the onions cook slowly in a cast iron skillet with a little salt and sugar until they are deep golden and soft. The salt works to draw out their natural moisture, while the sugar helps them brown and caramelize.
Once they are golden, we give them a splash of apple cider vinegar to deglaze the pan, loosening all of those flavorful brown bits. A drizzle of honey and a grind of black pepper finish the onions with a sweet and savory balance that pairs beautifully with the ham and provolone.
With that said, caramelizing the onions does take some patience. Keep the heat on medium to medium-low and please resist the urge to crush them. Crushing the onions drains their juices, and those juices are flavor - and no amount of deglazing will bring those flavors back. The good news is that they can be made up to 3 or 4 days ahead and stored in the fridge, so the sandwich itself comes together in minutes.
Spicy Mayo Dip
The spicy mayo dip takes all of two minutes to bring together, and truly elevates the sandwich's flavor and texture. We start by whisking the mayo with chili garlic sauce (or sambal oelek for a slightly cleaner heat), apple cider vinegar, honey, and black pepper. The end result is a deliciously creamy, tangy, sweet, and gently spicy sauce that's absolutely perfect for dunking each bite of the sandwich.
I do recommend using full-fat mayonnaise, as it provides the best texture, and we're really looking for that creamy contrast to the crispiness of the sandwich.
Air Fryer Method
For an ultra-crispy grilled ham and cheese, the air-fryer is a great, low-effort, low-risk-of-failure way to achieve precisely that, and is perfect for one or two portions. To use the air fryer for this recipe, start by assembling the sandwich as directed, then butter or mayo-brush the outside. Preheat the air fryer to 375 degrees F, place the sandwich in the basket, and cook for about 4 or 5 minutes. Flip it carefully and cook for another 3 to 4 minutes, or until it is golden and the cheese is melted.
Be aware that in some air fryer models, the air fryer's fan can lift the top slice of the bread. As such, I recommend securing the sandwich shut with a few toothpicks, and then be sure to remove them before serving.
Sheet Pan Oven Method (For a Crowd)
For making four to six sandwiches at once, the oven is your friend. To use the oven to make this recipe, place a large rimmed sheet pan in the oven and preheat it to 400 degrees F. Preheating the pan helps the bottoms of the sandwiches to start crisping immediately. Assemble the sandwiches, and then butter or mayo-brush the outside. After that, arrange the sandwiches on the preheated pan and bake for about six to eight minutes. Next, flip the sandwiches and bake for another four to six minutes, or until they are golden and the cheese is fully melted.
For flatter, more evenly pressed sandwiches, set a second sheet pan over the sandwiches as they bake in the oven. As always, oven temperatures vary from oven to oven, so let the color of the bread be your guide as to when they are done.
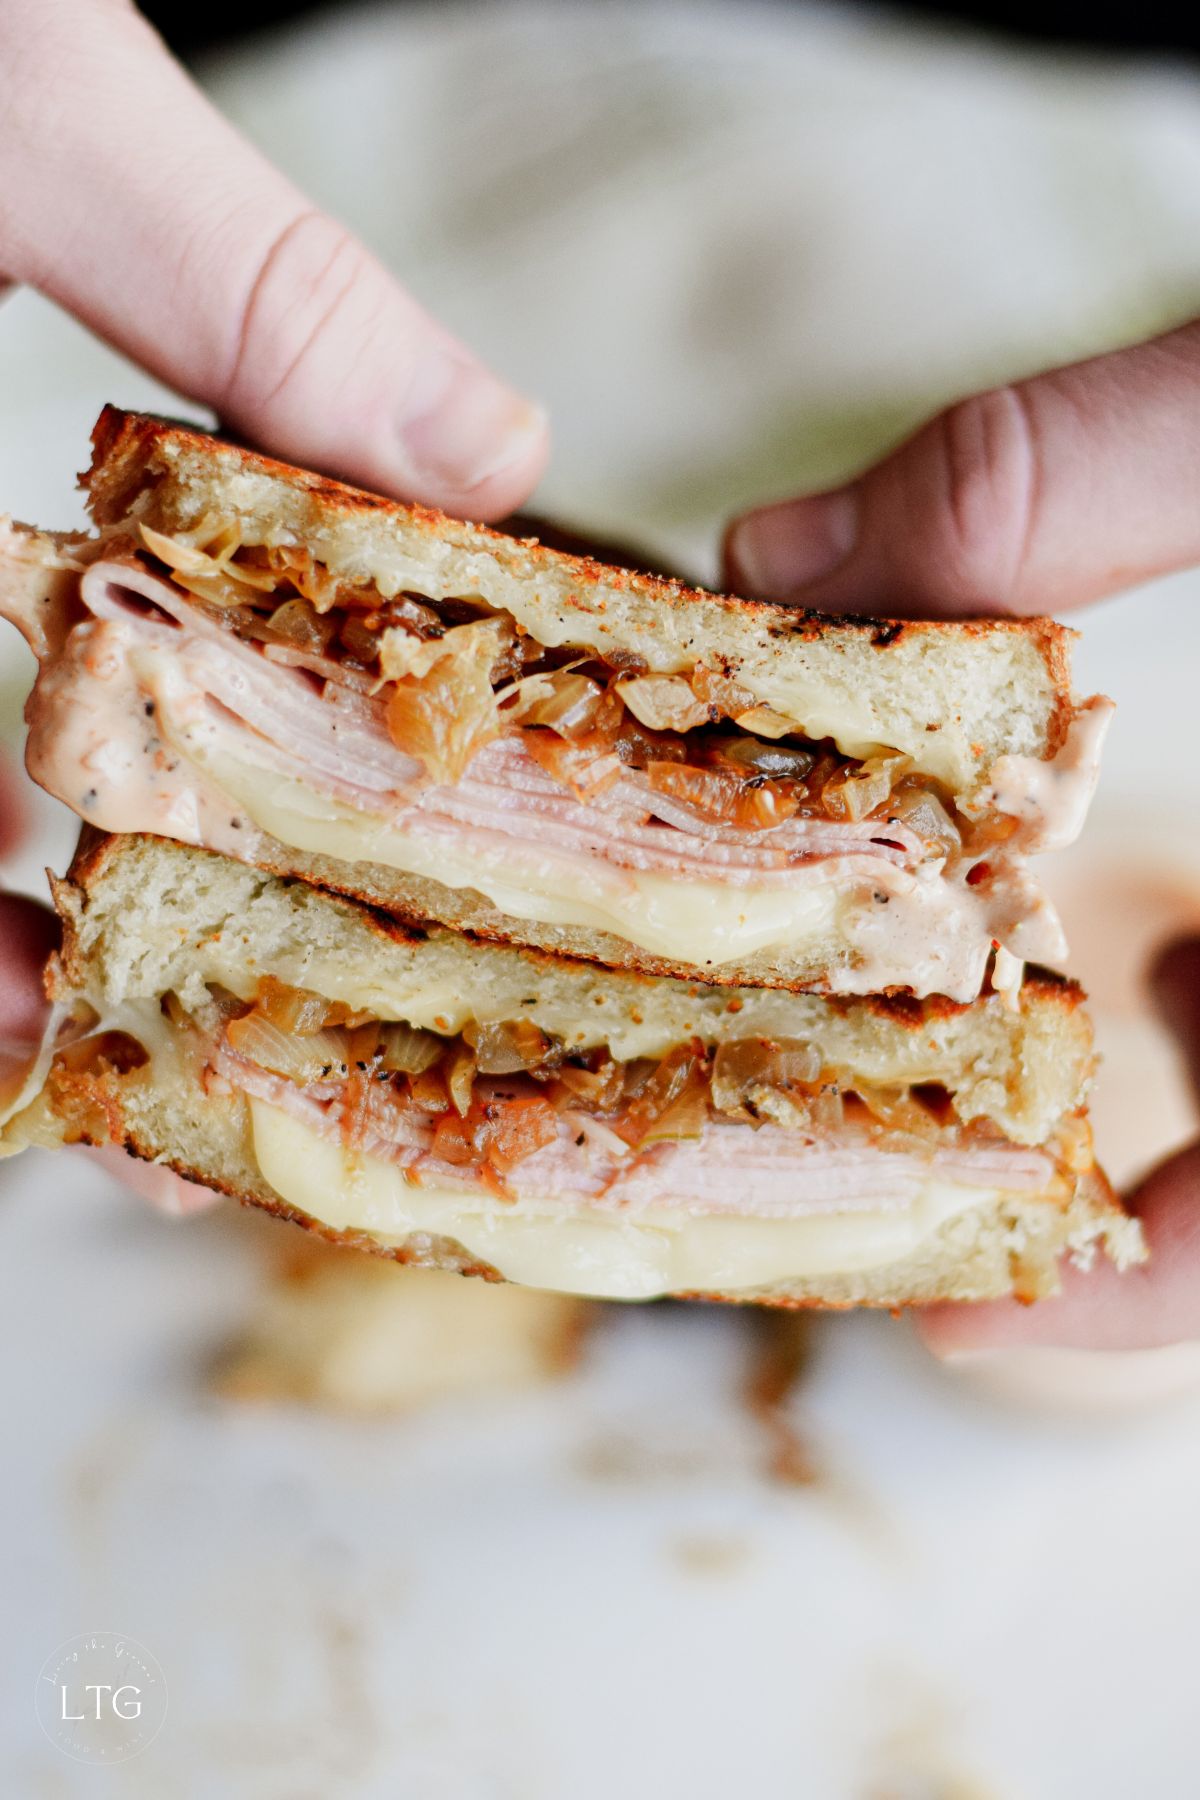
How to Make Grilled Ham and Cheese: Step by Step
Prepare the Add-Ons
- Spice Mayo: We start off easy by prepping the spicy mayo spread. To do this, stir the ingredients together in a small bowl, taste for seasonings, and then set it aside and let the flavors meld together as you prepare the rest of the sandwich.
- Next, prepare the caramelized onions in a large cast iron skillet. Let the onions become soft and golden before deglazing the pan with apple cider vinegar. Then transfer them to a bowl and toss with honey and black pepper.
Warm the Ham
Set a skillet over medium heat. Let the skillet become warm and then lay the ham slices flat in the pan for about 15 to 30 seconds per side, just enough to warm them through. We're not looking for the ham to start curling or darkening. We're just heating it through.
Assemble with Structural Layering
Butter the outside of each bread slice (or brush with mayonnaise if preferred). From there, build each sandwich as directed in the recipe card, following this sequence: bread, cheese, folded ham, caramelized onions, cheese, and then bread. Remember, the buttered or mayo-brushed sides of the bread should be facing outwards.
Grill Low and Slow
Heat a skillet over medium-low heat - I personally prefer cast iron for this. To test the skillet, spritz it with a few drops of water. If the water sizzles away immediately, it's ready. Then set the sandwiches down in the pan and set a second heavy pan or skillet on top of them to press them down gently. Pressing works to bring the bread into full contact with the pan for even, edge-to-edge browning, while facilitating the conduction of heat up through the sandwich. Grill the sandwich like this for about 3 to 5 minutes. You want the bottom to be golden and crisp. Once that's achieved, remove the top pan, flip the sandwich with a wide spatula, and then set the heavy pan or skillet over the sandwich. Grill for another 3 to 5 minutes until the other side is nice and golden and the cheese has completely melted.
→ Pro-Tip: If the bread is browning faster than the cheese is melting, lower the heat a little. I know that grilling over medium-low heat feels like it takes an eternity, but low and slow is the secret to a grilled sandwich that's crisp on the outside and melted and warm on the inside. Trust the process.
Rest and Slice
Once the sandwich is cooked, set it on a cutting board and let it rest for a couple of minutes - just one to two minutes. This brief resting period allows the melted cheese to set, helping to ensure that the filling does not slip out when you slice it. After the sandwich has rested, slice it in half diagonally with a sharp knife or a serrated knife, and serve right away with the spicy mayo dip.
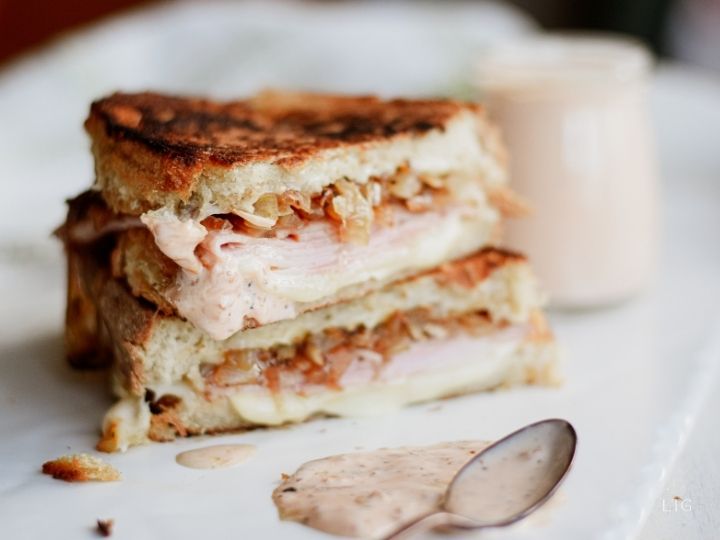
Tips for a Crispy Ham and Cheese Sandwich
- Use Cast Iron: My go-to for basically all my cooking needs is cast iron. It's sturdy and holds its heat steady and even. For this particular recipe, that means the bread browns uniformly.
- Keep the heat medium-low: Since we're cooking over medium-low heat, patience is your most important asset for this recipe. Patience is what allows the sandwich to develop a golden crust and fully melted cheese without burning the bread.
- Press It: Using a heavy pan or skillet to set over the top of the sandwich to press it as it cooks works to flatten the sandwich for better contact with the heat, resulting in more even browning and a crispier crust.
- Butter the Bread, not just the pan: We butter the bread itself to give it more even coverage, which results in better browning.
- Don't Overload It With the Onions: While we certainly want a generous portion of onions, we do not want so many onions that the sandwich becomes too moist or slides apart. Too many onions means too much moisture.
- Make the Onions Ahead: Caramelized onions can keep for several days in the fridge, and often develop their flavor as they sit. That means the onions are great for meal prep or as a make-ahead part of the sandwich.
Frequently Asked Questions
I recommend provolone, gruyere, Swiss, and medium-sharp cheddar. Provolone is my personal favorite for its creamy texture and excellent melt and stretch. Gruyère and Swiss are classic choices, though, for their nutty flavor, which pairs deliciously with ham. Medium-sharp cheddar, meanwhile, brings a somewhat bolder bite. For the best melt, I recommend using thin slices and letting the cheese come to room temperature before using.
Either works, but both have their pros and cons. Butter gives a richer, more buttery flavor, but can burn more easily. Butter is also harder to spread evenly than mayonnaise. Mayonnaise spreads easily and browns into an even, golden, crackly crust and is less likely to burn. Basically, it's taste vs. texture and color. For the best of both worlds, brush the bread with mayo and use butter in the pan.
The key is using sturdy, thick-sliced bread, and then layering in the optimal order that I outlined above, with a slice of cheese against each piece of bread so that the moister fillings, such as the ham and onions, sit in the middle with the cheese as a moisture guard on either side. Then, be sure to grill over medium-low heat and press for even browning, then serve only after letting the sandwich rest for a few minutes. Be careful here, as letting the sandwich sit for too long, or wrapping it while hot, traps steam and softens the crust.
Personally, I think a bowl of hearty soup is the classic partner for this sandwich. French fries are also a great choice, as is a crisp, fresh salad to keep things light. Pickles and kettle chips are also always great sides.

Grilled Ham and Cheese Sandwich
- Total Time: 30 minutes
Description
A twist on the classic ham sandwich, today's recipe features savory ham, melted provolone, and caramelized onions layered between thick-sliced Italian bread. Grilled to golden perfection and dolloped with a spoonful of spicy mayo, this is comfort at its decadent best.
Ingredients
- Thick-sliced bread
- Deli Ham
- Sliced Provolone cheese
- 2 or 3 onions, grilled
- Butter, for grilling
- For the Grilled Onions:
- 3/4 tsp. salt, for dusting the onions
- 1 tsp. sugar, for dusting the onions
- 1 tbsp. honey
- 2 tsp. apple cider vinegar
- 1/2 tsp. coarsely ground black pepper
- For the Mayo Dip:
- 1/2 cup mayonnaise
- 2 tbsp. chili garlic sauce
- 1 tbsp. apple cider vinegar
- 2 tbs. honey
- 1/2 tsp. coarse black pepper
Instructions
- For the Mayo Dip:
- Combine all of the ingredients in a small bowl and mix. Taste for seasoning. Set aside.
- For the Grilled Onions:
- Slice the onions very thin.
- Heat a large cast iron pan. Place the onions in the heated pan and sprinkle with the salt and sugar.
- Allow the onions to get a nice golden color and become very soft.
- Place the onions in a small bowl, add the apple cider vinegar, black pepper, and honey, and toss. Set aside.
- Building the Sandwich:
- Place about 2 slices of cheese and ham on each slice of bread.
- Place the onions on one side of the bread and then close the sandwich.
- Heat a large cast iron frying pan.
- Place a few pats of butter on one side of the closed sandwich and place it in the heated pan.
- Cover the sandwich with another heavy pan to press the sandwich down. Let the sandwich grill for about 3 minutes, until golden.
- Place butter pats on the ungrilled side and carefully turn the sandwich over to grill; place a heavy pan on top of the sandwich once again.
- Finish grilling for about 3 minutes.
- Prep Time: 10 minutes
- Cook Time: 20 minutes
And that's our Grilled Ham and Cheese Sandwich. If you enjoyed this recipe, or have any questions or suggestions, be sure to let us know in the comments below. We always love hearing from you!
Happy Cooking!




Lora says
This grilled ham and cheese feels elevated with melty provolone and sweet caramelized onions. The spicy mayo adds the perfect kick.
Ben says
Aww yeah. The grilled onions and the mayo dip made this bad boy pop. Next time, I'm making it with bacon!
Terri says
This is one fantastic ham and cheese. It's so much more flavorful than the old-fashioned kind.
Beth says
This really is the best. It has so much flavor. I made it with my Granny's homemade tomato soup recipe. YUM!
Lauren says
This was absolutely delicious!! 5/5 stars. Will definitely be adding this to our dinner repertoire.
Jenna says
This sounds really good, I love the addition of the onions!